How to Turn Your Hand-Drawn Art Into Stickers: A Complete Guide for Artists
If you're an artist or illustrator with a sketchbook full of beautiful drawings, you're sitting on sticker gold! Whether you work in pencil, ink, watercolor, or markers, I'm going to show you exactly how to turn your hand-drawn art into stickers - professional-quality stickers you can use, gift, or sell.
Why is this so exciting? Because as an illustrator (my husband is an ex-Disney hand-drawn animator!), you have a wonderfully unique opportunity to create stickers that truly stand out. Your original art style becomes your signature - something mass-produced stickers can never replicate.
The best part? You don't need expensive equipment or technical expertise. Just your artwork and a few simple tools most crafters already have at home.
Who This Guide Is For:
✅ Artists and illustrators who want to share their work in a new format
✅ Crafters who've created hand-drawn designs they love
✅ Anyone who wants to turn photos of artwork into stickers
✅ People looking to create unique, personalized sticker gifts
✅ Artists considering selling stickers as a new income stream
You do NOT need:
- Professional art training
- Expensive design software
- A cutting machine (though it helps!)
- Any previous sticker-making experience
What You'll Need to Get Started
Let me break down exactly what you need (and what you can skip):
Essential Supplies:
- Your original hand-drawn artwork (pencil, pen, marker, watercolor - anything works!)
- Scanner OR smartphone camera (your phone works great!)
- Computer or laptop (not a Chromebook)
- Regular color printer (inkjet or laser - you probably already have one)
- White matte sticker paper (Get my supply recommendations here - FREE!)
Optional But Helpful:
- Cutting machine: Silhouette Portrait/Cameo or Cricut Maker/Explore Air (makes cutting SO much easier)
- Free design software: Silhouette Studio or Cricut Design Space
- OR just scissors/craft knife if you prefer cutting by hand!
Free Tools You'll Love:
- Background remover tool like Remove.bg or Canva's background remover
- Free editing software like Canva (free version works great!)
💡 Pro tip: Don't let the "optional" list stop you! I've taught thousands of students who started with just their phone, printer, and scissors. You can always upgrade later.
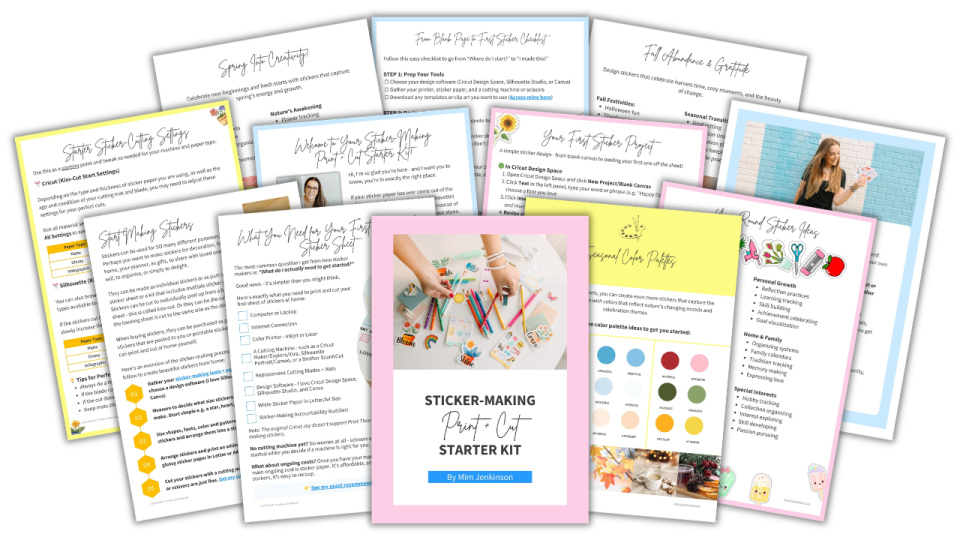
Download my Free Sticker-Making Starter Kit for my complete supply recommendations, shopping links, and money-saving tips!
Step-by-Step: How to Turn Drawings Into Stickers
Step 1: Create (or Choose) Your Drawing
Start with a drawing you love! This could be:
- A fresh illustration created specifically for stickers
- An existing piece from your sketchbook
- Practice sketches that turned out beautifully
- Commissions you're allowed to reproduce
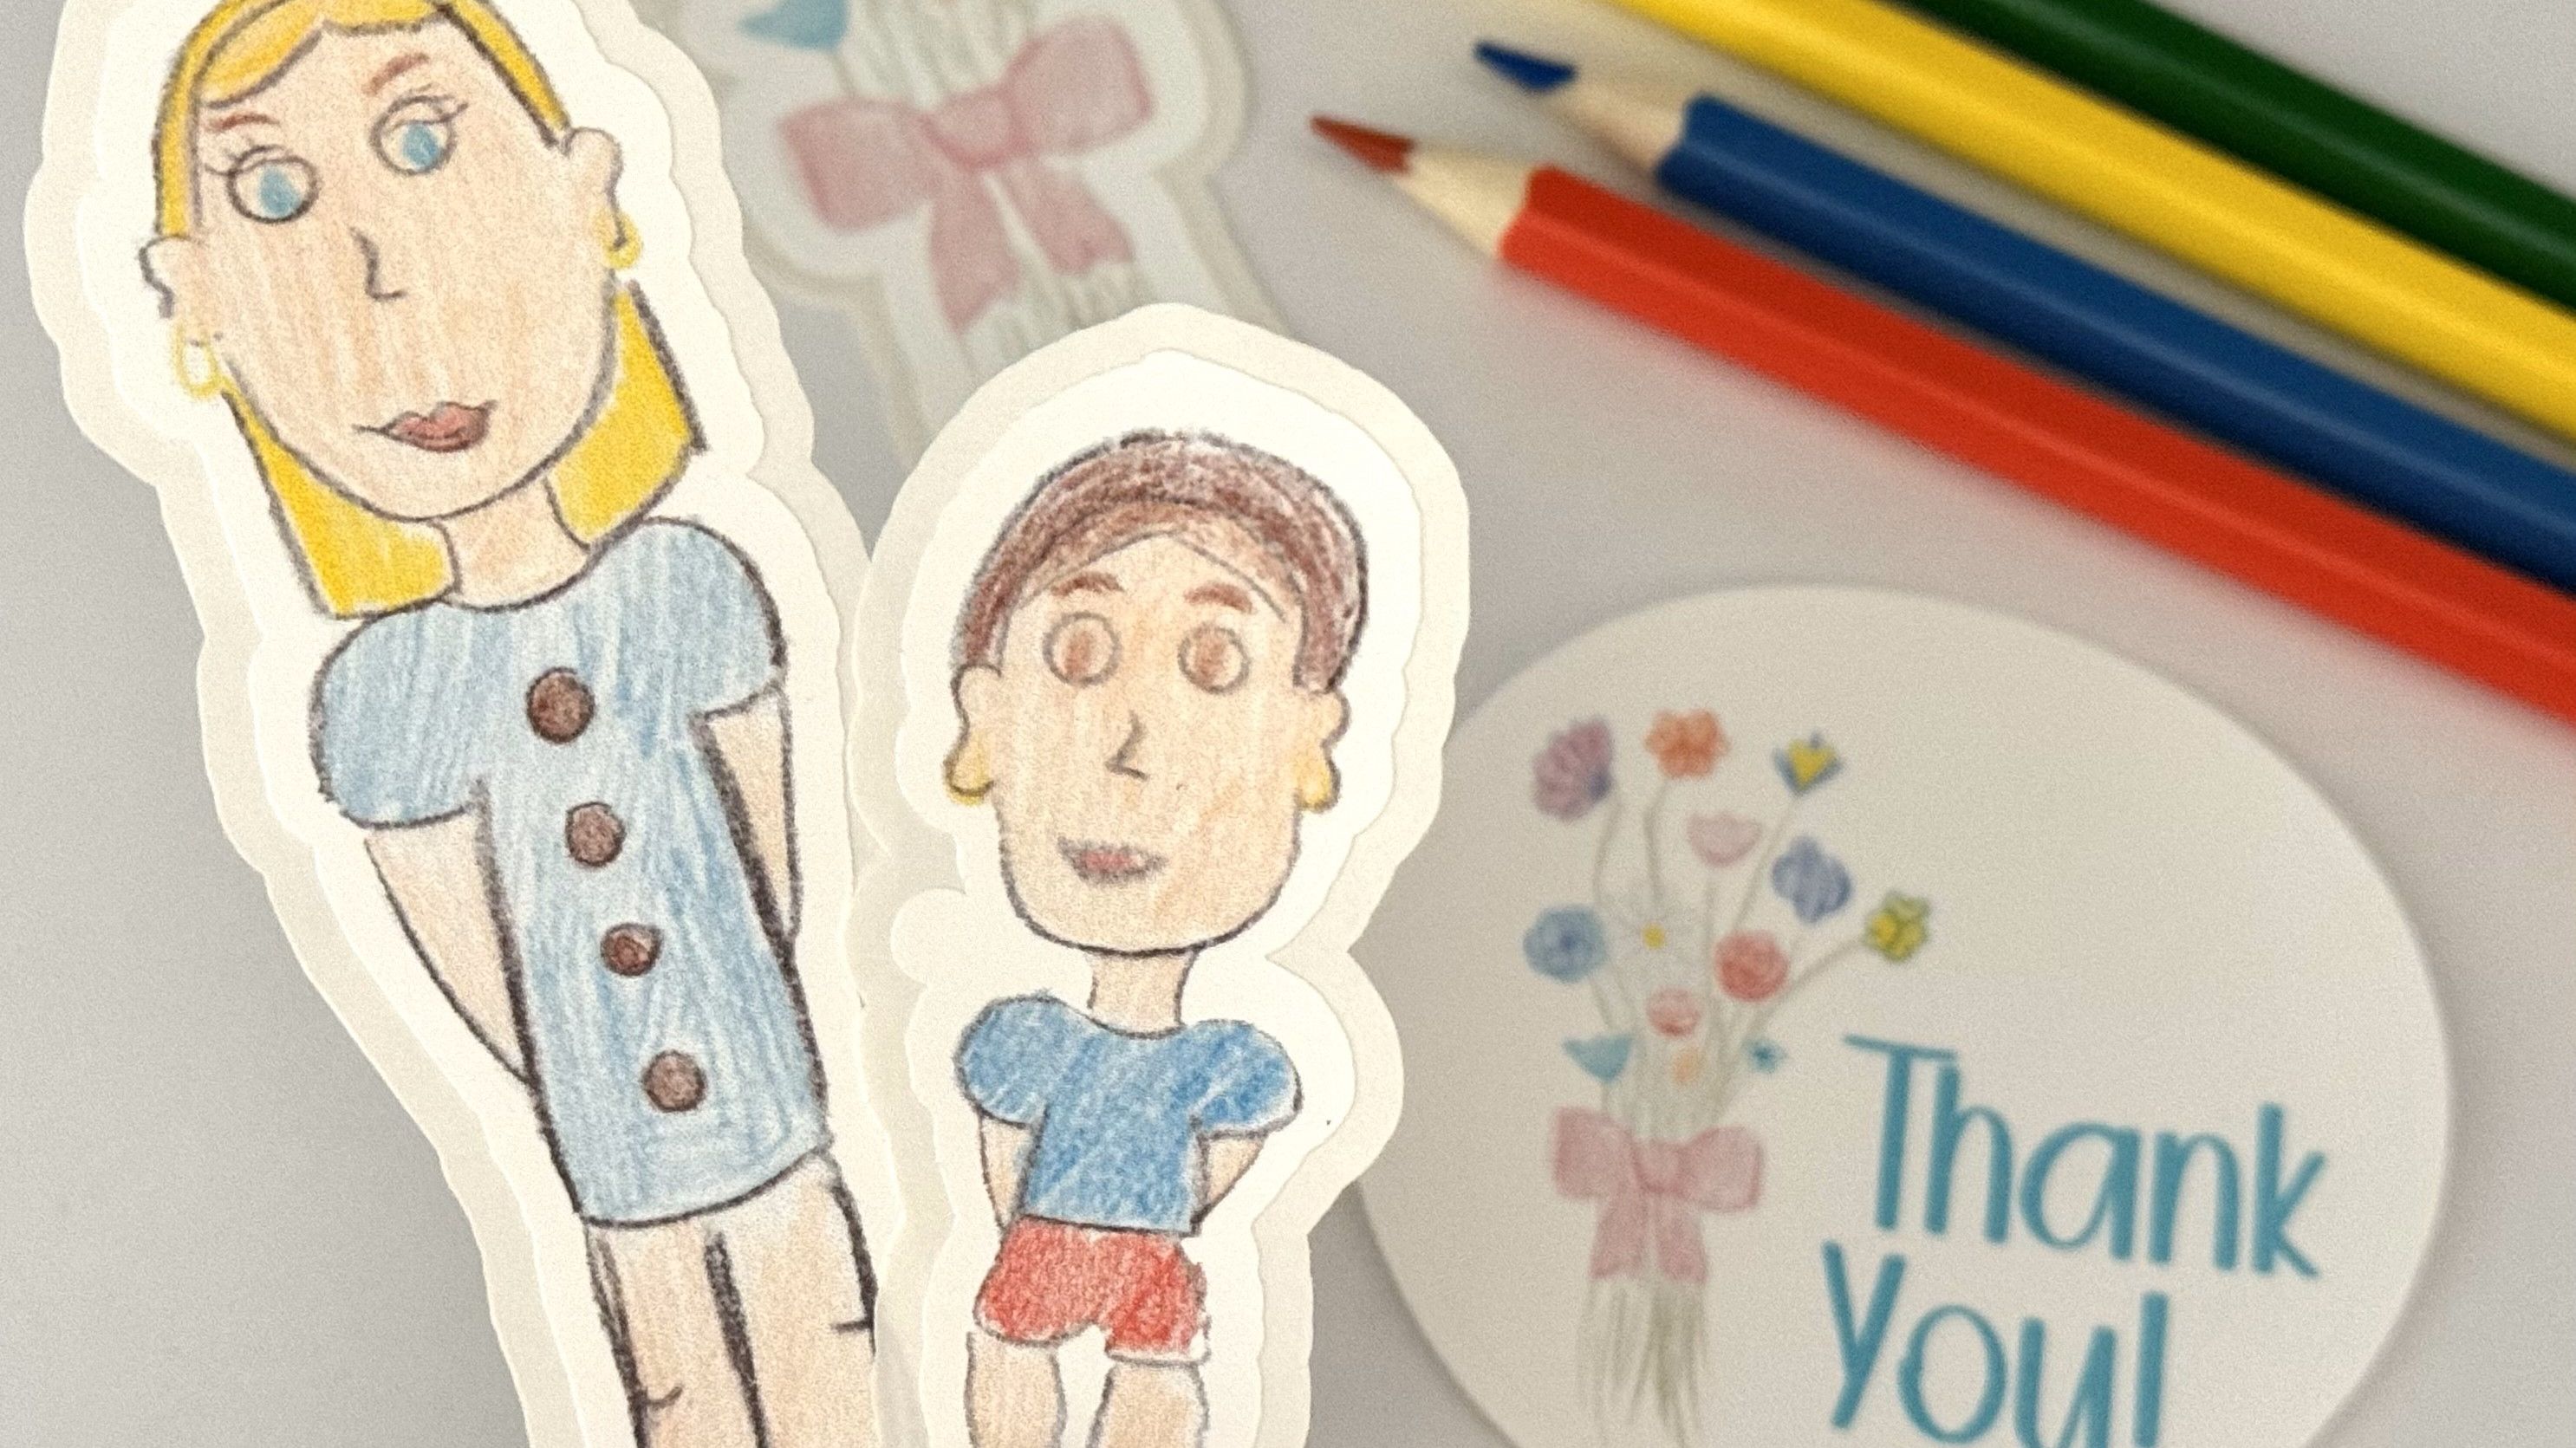
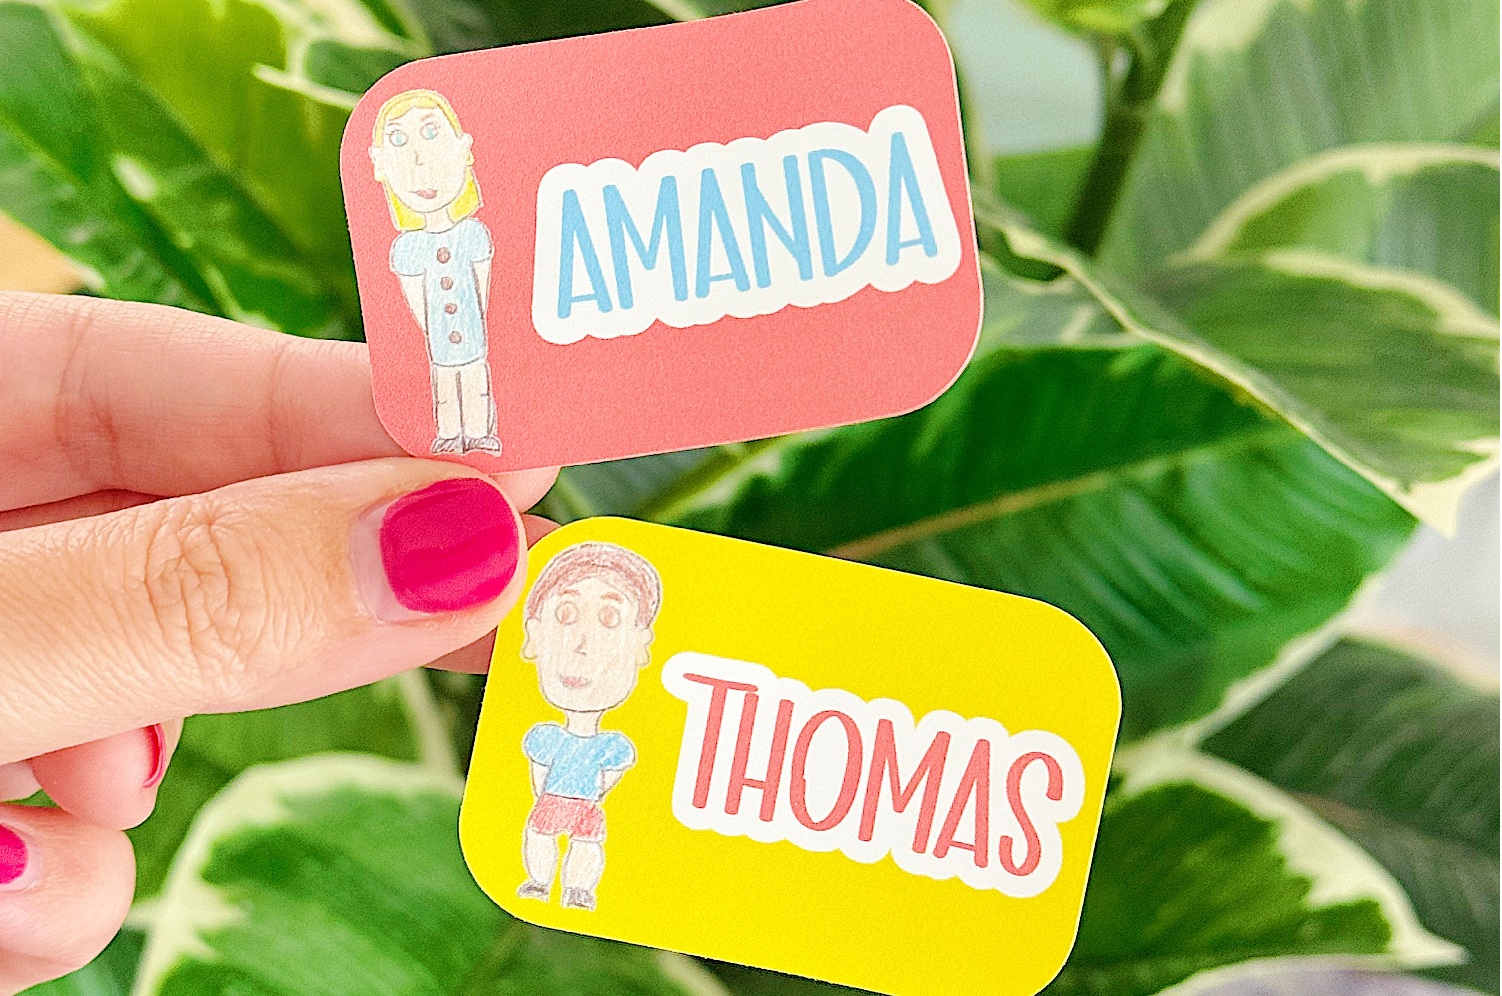
- Children's artwork (grandkids' drawings make THE BEST stickers!)
What works best for stickers:
- Clear, defined lines (pencil, ink, marker)
- Good contrast (not too light or faded)
- Simple to moderately detailed (overly intricate designs can get "muddy" when scaled down)
- Any style! Realistic, cartoonish, abstract, minimalist - it all works
💭 What our community says: "I was worried my sketchy drawing style wouldn't work for stickers, but they turned out amazing! The loose lines actually give them character." - Sarah, watercolor artist
Step 2: Digitize Your Drawing (Scan or Photograph)
This is where your hand-drawn art becomes digital - and it's easier than you think!
Option A: Scanning (Best Quality)
Settings to use:
- Resolution: 300 DPI minimum, 600 DPI for intricate drawings
- Color mode: RGB Color (even for black and white drawings)
- File format: Save as PNG (keeps quality) or JPG (smaller file size)
Quick scanning tips:
- Clean your scanner glass first (smudges show up!)
- Place drawing face-down, aligned with the corner
- Close the lid gently to avoid shifting
- Do a preview scan first to check positioning
Option B: Photographing (Quick & Easy)
How to get the best photo:
- Use natural lighting near a window (avoid direct sunlight)
- Lay drawing flat on a neutral surface
- Shoot straight down (not at an angle) to avoid distortion
- Fill the frame with your drawing
- Take multiple shots - you can choose the best one later
Phone camera settings:
- Turn OFF flash
- Use the highest resolution your phone offers
- Tap to focus on the drawing
- Avoid zoom - get physically closer instead
🎯 Pro tip: If you're photographing, take the photo against a solid, contrasting background (white paper on dark surface, or vice versa). This makes background removal SO much easier later!
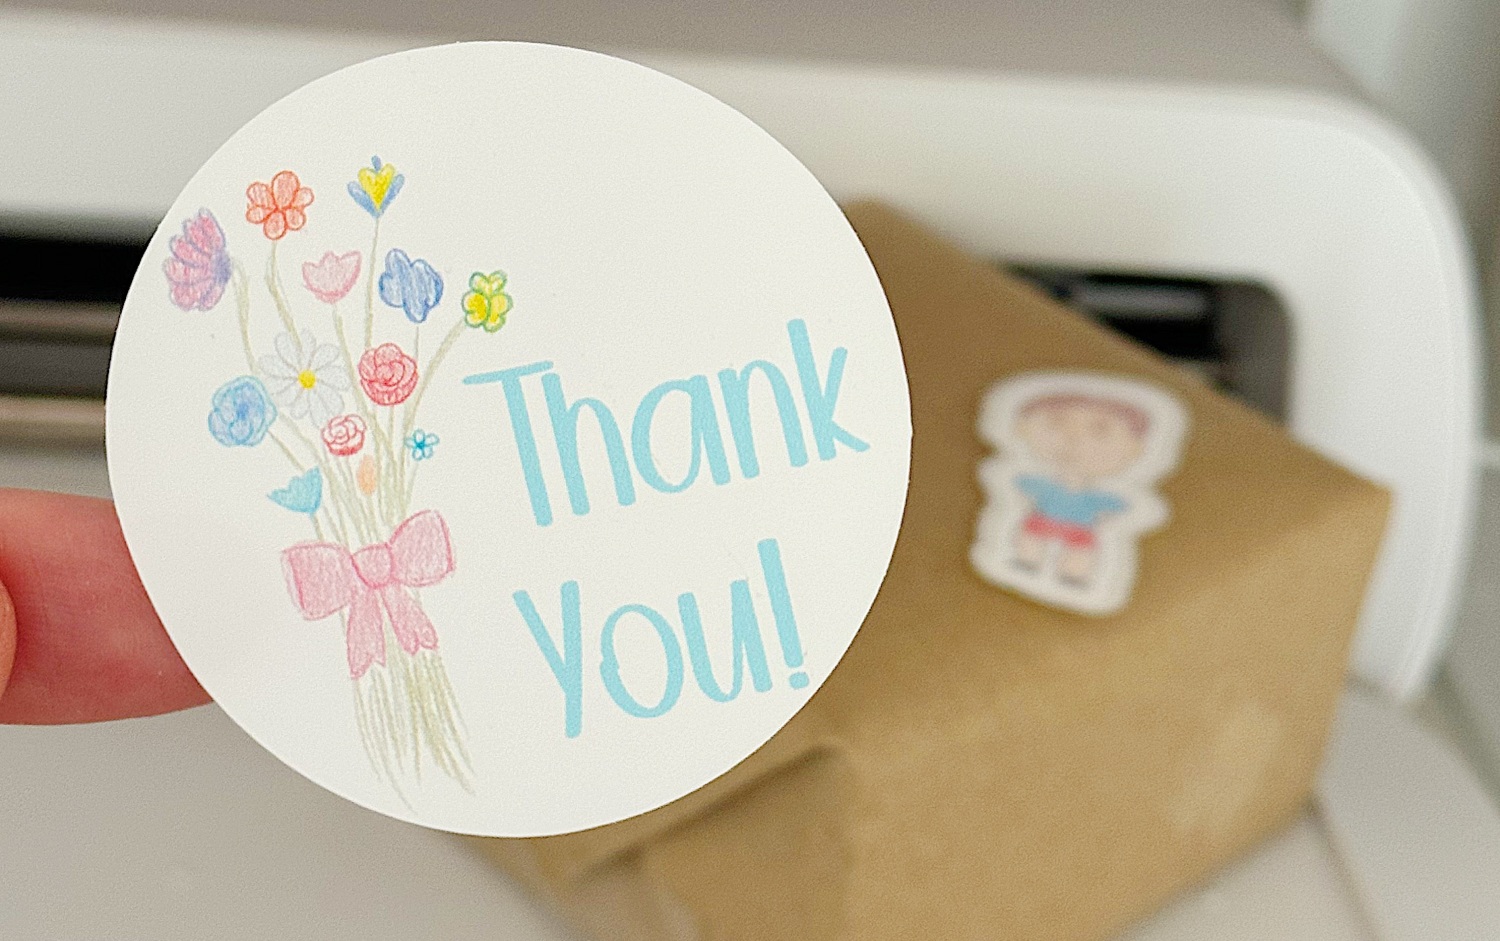
Step 3: Remove the Background (Optional But Recommended!)
Want your stickers to be die-cut shapes instead of squares? Remove that background!
Free tools that work great:
- Remove.bg: Upload your image, background disappears like magic
- Canva (free version): Upload image → Edit image → Background remover
- Photoshop/GIMP: Use the eraser or magic wand tool if you're comfortable with these
Why remove the background?
- Your stickers become the exact shape of your drawing
- They look more professional and polished
- No white borders or rectangles around your art
- More versatile for using on different colored surfaces
Step 4: Edit & Perfect Your Digital Image
Now that your drawing is digital, you can make it absolutely perfect for stickers!
Basic edits everyone should do:
- Adjust brightness: If your scan/photo looks too dark or washed out
- In Canva: Effects → Adjust → Brightness slider
- Sweet spot: Your whites should be white, your darks should be dark
- Boost contrast: Makes your lines pop and colors vibrant
- Increase contrast by 10-20% to start
- Don't go overboard - you want it to look natural
- Fix color balance: Match your original as closely as possible
- Compare side-by-side with your physical drawing
- Adjust until the screen matches what you see in person
- Clean up smudges: Use the eraser tool to remove:
- Scanner dust or marks
- Stray pencil lines you don't want
- Coffee stains (we've all been there!)
- Background shadows from photographing
What you DON'T need to do:
- Make it "perfect" - hand-drawn charm is the whole point!
- Remove every tiny variation - texture and character are good
- Redraw or trace it digitally (unless you want to)
💭 What our community says: "I spent an hour trying to make my watercolor scan 'perfect' until I realized the little imperfections are what make it special. Now I just do quick cleanup and I'm done!" - Michelle, artist
Step 5: Size & Format Your Design for Stickers
Time to turn your artwork into actual sticker layouts! This is where free software like Silhouette Studio or Cricut Design Space becomes your best friend.
Choose your sticker format:
📐 Single stickers (die-cut):
- Your drawing becomes one individual sticker
- Size: Usually 2-4 inches works perfectly
- Great for: Laptop stickers, water bottle stickers, single designs
📄 Sticker sheets (multiple stickers):
- Arrange multiple designs on one 8.5" x 11" sheet
- Can include same design in different sizes
- Great for: Planner stickers, variety packs, gifts
Sizing tips:
- Too small (under 1.5"): Intricate details may get lost
- Sweet spot (1.5-4"): Perfect for most uses
- Too large (over 6"): May look pixelated if your scan isn't high enough resolution
Test for quality:
- Zoom in to 100% on your screen
- Can you see pixels or is it smooth?
- Smooth = good to go!
- Pixelated = need to rescan at higher resolution
If you're using a printing company instead of printing at home: They'll have specific requirements. Common ones include:
- File format: PDF, PNG, or AI
- Resolution: 300 DPI minimum
- Color space: CMYK (vs. RGB)
- Bleed area: Usually 0.125" extra around edges
Step 6: Print Your Stickers
The moment of truth! Let's get your art onto sticker paper.
Printer settings for best results:
🖨️ Quality settings:
- Print quality: Best or High (not draft!)
- Paper type: Glossy photo paper or matte (depending on your sticker paper)
- Color management: Let printer manage colors
Before printing a full sheet:
- Print a test on regular paper first
- Check size, colors, positioning
- Make adjustments if needed
- This saves expensive sticker paper!
- Load sticker paper correctly
- Glossy/matte side UP (the side you print on)
- Only load 1-2 sheets at a time
- Check your printer manual for manual feed if you have issues
- Let it dry!
- Inkjet prints: Wait 2-3 minutes before touching
- Laser prints: Good to go immediately
- Don't rush or you'll smear your beautiful art!
Common printing problems solved:
❌ Colors look different than on screen:
- Your screen and printer use different color systems (normal!)
- Do a test print and adjust brightness/saturation
- Keep notes on what settings work best
❌ Print is too light:
- Increase brightness and contrast before printing
- Check ink levels
- Use "Best" quality setting
❌ Paper jamming:
- Only load 1-2 sheets of sticker paper at a time
- Make sure paper is perfectly flat (not curled)
- Try manual feed option if available
💰 Money-saving tip: Test everything on regular paper first! Your sticker paper costs $1-2 per sheet, regular paper costs pennies. I learned this the expensive way so you don't have to!
Get my complete printer settings guide in my Free Sticker-Making Starter Kit
Step 7: Cut Your Stickers
Final step - cutting your stickers free from the sheet!
Option A: Cutting Machine (Recommended)
Best machines for stickers:
- Cricut Maker, Cricut Explore Air, or Cricut Xtra
- Silhouette Portrait or Cameo
- Brother ScanNCut
Why I recommend a cutting machine:
- Cuts perfectly every time (no shaky hands!)
- Saves HOURS on intricate shapes
- Can kiss-cut (cut sticker only, not backing) or die-cut (cut all the way through)
- Handles tiny details you'd struggle with by hand
Basic cutting settings to start with:
- Material: Sticker paper (or cardstock for matte sticker paper)
- Blade: Standard blade
- Speed: Medium
- Pressure: Less
🎓 Never cut stickers before? My Print and Cut Kit course teaches you the EXACT settings for your machine and paper combo - so you never waste materials on failed cuts!
Option B: Scissors or Craft Knife
No machine? No problem! Hand-cutting works beautifully for:
- Simple shapes (circles, squares, rectangles)
- Larger stickers (3"+ are easier to cut)
- Kiss-cut sheets (where you want the stickers on backing paper)
Hand-cutting tips:
- Use sharp scissors or a fresh blade
- Cut slowly - accuracy matters more than speed
- For intricate shapes, cut the general shape first, then refine
- Use a ruler and craft knife for straight edges
What's easier with scissors:
- Large, simple shapes
- Straight-edged designs
- Sticker sheets where all stickers are squares/rectangles
What's tough with scissors:
- Tiny details
- Organic, curvy shapes
- Perfect circles
- Repetitive cuts (your hand gets tired!)
Common Mistakes to Avoid (Learn From My Fails!)
❌ Mistake #1: Using Low-Resolution Images
What happens: Your beautiful drawing prints blurry or pixelated - heartbreaking!
The fix:
- Scan or photograph at minimum 300 DPI
- For detailed drawings, use 600 DPI
- When in doubt, higher resolution is always better
- You can always make images smaller, but you can't add detail later
How to check: Zoom in to 100% on your computer. If you see individual pixels or blurriness, your resolution is too low.
❌ Mistake #2: Skipping the Test Print
What happens: You print 20 stickers only to realize they're the wrong size, wrong color, or cut off at the edges.
The fix:
- ALWAYS print one test on regular paper first
- Check size, color, positioning
- Make adjustments
- THEN print on sticker paper
- This one habit will save you hundreds of dollars in wasted materials!
💭 What our community says: "I wasted three sheets of expensive sticker paper before I learned to test on regular paper first. Now it's automatic - test, adjust, then print for real!" - Kim, illustrator
❌ Mistake #3: Ignoring Color Calibration
What happens: Your drawing looks perfect on screen but prints out with weird colors - too orange, too dark, too washed out.
The fix:
- Screens and printers use different color systems (RGB vs. CMYK) - colors will shift a bit
- Do a test print first thing (see, I told you test prints matter!)
- Adjust brightness, contrast, and saturation until print matches your vision
- Keep notes! "Increase brightness by 15%, decrease saturation by 10%" so you remember for next time
- Accept that it won't be 100% identical to the original - that's okay!
❌ Mistake #4: Overcomplicating Your Design
What happens: Your sticker is so detailed and busy that when scaled down, it just looks muddy or confusing.
The fix:
- Remember: simpler often = better for stickers
- If your drawing has tons of tiny details, consider making it a larger sticker (4-6")
- For smaller stickers (2-3"), stick with clearer, bolder designs
- Test different sizes to see what showcases your art best
- Sometimes making a separate, simplified version works better than shrinking the detailed original
When detail works:
- Larger stickers (4"+)
- When there's good contrast (not all mid-tones)
- Art styles like zentangle, mandala, technical illustration
When to simplify:
- Small stickers (under 2.5")
- Subtle shading or low contrast
- Watercolor washes without defined edges
❌ Mistake #5: Not Testing Cut Settings First
What happens: Your cutting machine cuts too deep (cuts through the backing), too shallow (stickers won't peel), or completely misses the design.
The fix:
- Start with manufacturer's recommended settings
- Do a small test cut first (just one sticker, not the whole sheet!)
- Adjust blade depth up or down as needed
- Keep a settings log
- Different paper brands need different settings - always test!
📚 Struggling with cut settings? My Print and Cut Kit includes troubleshooting checklists and settings trackers so you get perfect cuts every time!
❌ Mistake #6: Printing a Huge Batch Without Selling One First
What happens: You print 100 stickers of your design, then realize nobody wants to buy that particular style, or you find a mistake, or you just get sick of looking at them!
The fix (if you're planning to sell):
- Print small batches first (5-10 stickers)
- Test the market
- Get feedback
- THEN scale up once you know they sell
- This applies to gifts too - make a few samples to see what people actually love
Let's Bust Some Myths About Art Stickers!
Myth #1: "It's Too Expensive to Make Stickers From My Art"
The reality: Printing companies CAN be pricey (often $50-100 minimum orders), but printing at home costs pennies per sticker!
The breakdown:
- Sticker paper: $10-15 for 25 sheets = $0.40-0.60 per sheet
- Ink: Approximately $0.20-0.50 per sheet
- Total cost per sticker sheet: Under $1!
Compare that to buying similar stickers online ($3-8 per sheet), and you're saving a ton while getting to use YOUR unique art!
🎓 Want to learn to print and cut your own stickers at home? My Sticker Making 101 course teaches you the complete process - from design to cutting - so you can make unlimited stickers for just pennies each!
Myth #2: "You Need to Be a Professional Artist"
The reality: I've taught over 20,000 students to make stickers, and they come from ALL experience levels!
Who's making stickers:
- Hobbyist doodlers
- Grandmas turning grandkids' drawings into stickers
- Teachers making classroom rewards
- Journal enthusiasts decorating their pages
- Artists who "don't think they're good enough"
The only requirement is that YOU like your drawing. That's it!
Myth #3: "Stickers Are Just for Kids"
The reality: Not true! The global sticker market is expected to reach $13.7 billion by 2027 - and it's not all Paw Patrol and unicorns!
Who buys stickers:
- Planner fans (huge community of mostly adults!)
- Laptop/water bottle decorators (college students and professionals)
- Bullet journal creators (predominantly 25-45 age range)
- Small business owners (for packaging, branding, marketing)
- Collectors (yes, adult sticker collectors are a thing!)
- Crafters and scrapbookers
Popular adult sticker categories:
- Minimalist aesthetic designs
- Motivational quotes
- Organizational/functional stickers
- Botanical/nature illustrations
- Coffee/wine/food themes
- Pet portraits
- Mental health/wellness themes
Myth #4: "Hand-Drawn Stickers Aren't Professional Enough"
The reality: Hand-drawn is a SELLING POINT, not a weakness!
Why people LOVE hand-drawn stickers:
- Unique - can't get them anywhere else
- Authentic - real human touch
- Imperfect in the best way - character and charm
- Support real artists, not mass production
- One-of-a-kind aesthetic
Digital is everywhere. Hand-drawn stands out.
In fact, many of my most successful sticker-selling students specifically market their stickers as "hand-drawn" or "hand-illustrated" - it's a badge of honor!
Myth #5: "I Need Expensive Software Like Adobe Illustrator"
The reality: FREE software works perfectly for turning drawings into stickers!
What I use and teach:
- Cricut Design Space (completely free)
- Silhouette Studio (free version is fantastic!)
- Canva (free version available)
What you DON'T need:
- Adobe Illustrator
- Photoshop
- Procreate (unless you already use it to draw digital art - I love it!)
- Any paid design software (except perhaps Canva Pro)
When you might WANT paid software:
- If you're already comfortable with it
- If you're doing complex digital manipulation
- If you're creating original digital art (vs. scanning hand-drawn)
But for the process of turning hand-drawn art into stickers? Free tools do the job beautifully!
🎓 Never used design software before? I teach both Silhouette Studio and Cricut Design Space from absolute scratch in Sticker Making 101 - you'll be designing like a pro by the end!
The Amazing Benefits of Turning Your Art Into Stickers
Benefit #1: Share Your Art With the World
Your drawing is currently in your sketchbook, maybe posted on Instagram. As a sticker? It becomes:
- Portable art people carry everywhere
- Decoration on water bottles, laptops, planners, phone cases
- Visible to strangers who ask "Where did you get that sticker?"
- A conversation starter about your art
Your art deserves to be seen. Stickers make that happen.
Benefit #2: Create a Passive Income Stream
Once you've designed and printed your stickers, you can sell them:
- On Etsy (millions of active sticker buyers!)
- At local markets and craft fairs
- Through your own website
- On social media (Instagram, TikTok, Facebook Marketplace)
The beautiful part: You create the design ONCE, print on demand (or in small batches), and sell over and over.
Price range: Handmade sticker sheets typically sell for $3-8 each, individual die-cut stickers for $2-4.
Profit margins: When printing at home, your cost is under $1 per sheet, so you keep most of the selling price as profit!
Benefit #3: Low-Risk Way to Test Your Art Market
Not sure if people would buy your art? Stickers are the perfect test!
Why stickers are ideal for testing:
- Low price point ($3-8) = easy impulse buy
- Low commitment for customers
- Inexpensive for you to produce
- Quick to make in small batches
- Get real feedback on what people love
The progression I see constantly:
- Artist makes stickers of their drawings
- Sells them online or at markets
- Learns which styles/subjects people love
- Uses that knowledge to create larger art pieces, prints, or commissions
- Builds a following and customer base
Stickers become your market research AND your income stream!
Benefit #4: Perfect for Gifts (That Actually Get Used!)
Made-with-love gifts are wonderful... but let's be honest, handmade items sometimes end up in a drawer.
Stickers are different:
- Small and easy to use
- No commitment needed (not like displaying a large painting)
- Perfect for any age
- Actually functional (decorate planners, laptops, water bottles, journals)
- Personal and unique
Gift ideas using your art stickers:
- Custom stickers of grandkids' drawings for family
- Pet portrait stickers for pet owners
- Inside joke illustrations for your best friend
- Inspirational quote stickers for someone going through tough times
- Hobby-themed stickers (for the gardener, reader, coffee lover in your life)
💭 What our community says: "I turned my daughter's artwork into stickers and made sheets for all the grandparents for Christmas. They put them on their water bottles, planners, and laptops. Now they see her art every single day - way better than a framed drawing that sits on a shelf!" - Karen, proud mom
Benefit #5: It's Incredibly Fun and Rewarding!
I'm going to be honest with you - there's something MAGICAL about holding a sticker you made from your own artwork.
The feeling:
- Pride ("I made this!")
- Accomplishment (seeing your drawing in a new form)
- Joy (it's just plain fun!)
- Excitement (wondering what to make next)
- Creative fulfillment (making art + making stickers = double creativity!)
Plus, it's a creative outlet that fits into real life:
- Make stickers while watching TV
- Print a few sheets on Sunday afternoon
- Cut stickers during your kid's nap time
- It's flexible, relaxing, and doable
🌟 Want ongoing inspiration, new techniques, and a supportive community? Join us in the Secret Sticker Society - our membership gives you monthly tutorials, templates, and a community of sticker-loving friends who totally get your excitement!
Benefit #6: Versatility - Stickers Are For EVERYTHING
Your art as a sticker can be used in so many ways:
For planners:
- Functional stickers (to-do boxes, habit trackers)
- Decorative headers and borders
- Inspirational quotes
- Seasonal themes
For organization:
- Pantry labels
- Folder labels
- Storage box labels
- Name labels for kids' stuff
For business:
- Packaging decoration
- Thank you stickers for orders
- Branding stickers with your logo
- Business card alternatives
For fun:
- Laptop decoration
- Water bottle customization
- Phone case decoration
- Scrapbooking and journaling
- Gift wrap embellishment
- Card making
One design = endless possibilities!
What to Do With Your Art Stickers
Now that you know HOW to make them, here's what you can actually DO with your hand-drawn art stickers:
Use Them Yourself:
- Decorate your planner or bullet journal
- Personalize your laptop, phone case, or water bottle
- Add them to gift wrap or cards
- Label and organize your home
- Journal about your creative process
Gift Them:
- Holiday gifts for friends and family
- Teacher appreciation gifts
- Thank you gifts
- Birthday presents
- Just-because surprises
Sell Them:
- Etsy shop (largest online sticker marketplace!)
- Local craft fairs and markets
- Instagram or TikTok shop
- Consignment at local boutiques
- Your own website
Use for Marketing:
- Include with product orders (if you have a business)
- Hand out at networking events
- Use as business cards
- Send to influencers or potential collaborators
- Include in welcome packets or promotional materials
Frequently Asked Questions
Q: What resolution should I scan my drawings at?
A: Minimum 300 DPI, but I recommend 600 DPI for detailed work. Here's why:
- 300 DPI is the standard for quality printing
- 600 DPI gives you flexibility to scale up without losing quality
- You can always reduce resolution, but you can't add it back
Think of it like this: scanning at high resolution is like taking the highest quality photo possible. You might not always need it, but it's there if you do!
Q: Can I use phone photos instead of scanning?
A: Absolutely! Here's how to get the best results:
- Use natural lighting (near window, but not in direct sunlight)
- Shoot straight down (not at an angle)
- Make sure your drawing fills most of the frame
- Take multiple photos and pick the sharpest one
- Use your phone's highest resolution setting
Modern smartphone cameras (even from several years ago) are usually 8-12+ megapixels, which is plenty for stickers!
Q: What's the best sticker paper for hand-drawn art?
A: It depends on your art medium and desired finish:
For pencil/ink drawings:
- Matte sticker paper (no glare, looks most like the original)
For watercolor/marker drawings:
- Glossy sticker paper (makes colors pop, water-resistant)
For mixed media:
- Try both! I often prefer matte for a more "authentic" look
My recommendations:
- Budget-friendly: Online Labels or Avery brand
- Premium: Koala sticker paper or Silhouette brand
- All available on Amazon!
Get my complete supply list in my Free Sticker-Making Starter Kit
Q: Do I really need a cutting machine, or can I use scissors?
A: Both work! Here's how to decide:
Choose scissors/craft knife if:
- You're making simple shapes (squares, rectangles, large circles)
- You're only making a few stickers occasionally
- You enjoy the meditative process of hand-cutting
- You're not ready to invest in a machine yet
Choose a cutting machine if:
- You want intricate die-cut shapes
- You plan to make stickers regularly
- You want consistent, professional-looking cuts
- You want to save time (machines are FAST!)
- You're making stickers to sell
The honest truth: I started with scissors and it worked fine! But once I got a Silhouette, I wished I'd done it sooner. The time savings and precision are incredible.
Budget tip: Silhouette Portrait is the most affordable entry-level machine (~$150-200) and perfect for stickers!
Q: How do I price stickers made from my original art?
A: Here's a simple pricing formula:
For handmade stickers:
- Calculate your costs (paper, ink, time)
- Check competitor pricing on Etsy
- Price at least 3-4x your material costs
Typical ranges:
- Die-cut individual stickers: $2-4 each
- Kiss-cut sticker sheets: $4-8 per sheet
- Custom/commissioned designs: $10-15+ per sheet
Price higher if:
- Original hand-drawn art (not digital)
- Intricate, detailed designs
- Unique or niche subject matter
- You're an established artist
Remember: Don't undervalue your art! Your drawings are unique and can't be replicated by anyone else.
Q: Can I sell stickers made from my art?
A: YES - with these important considerations:
You CAN sell stickers if:
- You created the original artwork yourself
- You own the copyright to the design
- You're not using copyrighted characters, logos, or branded content
- You're not copying someone else's art style too closely
You CANNOT sell stickers featuring:
- Disney characters, Marvel, DC, etc.
- Brand logos (Starbucks, Nike, etc.)
- Celebrity faces or likenesses
- Song lyrics or quotes you don't own
- Other artists' work (even if you redrew it)
Gray areas to be cautious about:
- Fan art (technically trademark infringement even if you drew it)
- "Inspired by" designs (tread carefully!)
- Public domain images (these are okay, but verify they're actually public domain)
Safe bets:
- Your original illustrations
- Your original lettering/quotes
- Generic subjects (flowers, animals, objects)
- Abstract designs
- Your own photography
Q: My colors look different when printed - help!
A: This is SO common! Here's why and how to fix it:
Why it happens:
- Screens use light (RGB colors)
- Printers use ink (CMYK colors)
- They literally can't show the exact same colors!
How to get closer:
- Print a test on regular paper
- Compare to what you see on screen
- Adjust brightness, saturation, and hue in your editing software
- Print another test
- Repeat until you're happy
- SAVE YOUR SETTINGS for next time!
Pro tips:
- Colors will always shift slightly - that's normal
- Prints often come out slightly darker than screen
- Vibrant screen colors (especially bright blues and greens) are hardest to match
- Take notes: "Increase brightness by 15% for this printer"
Q: I'm not very artistic - can I still do this?
A: YES! Here's the secret: You don't need to be "artistic" to create stickers people love.
What matters more than artistic skill:
- Enthusiasm (you're excited about your designs!)
- Uniqueness (your style is YOUR style - own it!)
- Authenticity (hand-drawn imperfections are charming!)
- Consistency (showing up and making more)
Plus, artistic skill is subjective:
- Simple line drawings are hugely popular
- "Messy" watercolor styles are trendy
- Minimalist stick figures sell well
- Hand-lettered quotes don't require drawing at all
The truth: If you can draw something - ANYTHING - you can make it into a sticker. And someone out there will love it!
Q: How long does this whole process take?
A: Here's a realistic timeline:
Your first time (learning mode):
- Scanning/photographing: 10-15 minutes
- Editing: 20-30 minutes
- Designing/formatting: 30-45 minutes
- Printing: 5-10 minutes
- Cutting: 15-30 minutes
- Total: 1.5-2 hours
Once you know what you're doing:
- Scanning/photographing: 5 minutes
- Editing: 5-10 minutes
- Designing/formatting: 10-15 minutes
- Printing: 5 minutes
- Cutting: 5-10 minutes
- Total: 30-45 minutes
The beauty: You can make multiple designs at once!
- Scan 5 drawings in one session
- Edit them all together
- Arrange multiple designs on one sticker sheet
- Print and cut several sheets at once
Time-saving tip: Batch your work! E.g. you might scan all the week's drawings on Monday, edit them Tuesday, design Wednesday, print and cut Friday. Much more efficient than doing the entire process for each drawing individually.
Q: What if I mess up?
A: You will! We all do. Here's what to do:
Messed up the scan/photo:
- Just take another one! Digital is forgiving
Messed up the edit:
- Use "undo" or start over with original file
- Save your original BEFORE editing so you can always go back
Messed up the print:
- This is why we test on regular paper first!
- If you already printed on sticker paper, try different settings and print again
- Worst case: you wasted $0.50 of sticker paper. Learn and move on!
Messed up the cut:
- Adjust your settings and try again
- Use the "messed up" stickers for personal use or testing
- Every sticker maker has a collection of "practice stickers"!
The mindset shift: Mistakes are how you learn your specific equipment and find your best process. Every "messed up" sticker gets you closer to perfect stickers!
💭 What our community says: "I wasted probably 10 sheets of sticker paper when I first started. It felt terrible! But now I can print and cut perfectly every time. Those mistakes taught me exactly what NOT to do, and that's valuable knowledge I use every single time I make stickers now." - Sherie
Your Next Steps: Start Turning Your Drawings Into Stickers Today!
You now know exactly how to transform your hand-drawn art into beautiful, professional-looking stickers!
Here's what to do right now:
Step 1: Gather Your Supplies
Download my Free Sticker-Making Starter Kit to get:
- Complete supply list with shopping links
- My recommended brands for sticker paper, printers, and cutting machines
- Quick-start checklist
- Troubleshooting guide
Step 2: Choose Your First Drawing
Pick something simple to start:
- Clear, defined lines
- Not too intricate
- A design you're proud of
- Something you'd be excited to see as a sticker!
Step 3: Learn the Full Process
Ready to go deeper? Choose your path:
🎨 Complete beginner to sticker-making? → Sticker Making 101 teaches you everything from design to cutting in under 2 hours!
✂️ Have a cutting machine but struggling with print and cut? → Print and Cut Kit gives you perfect cut settings and troubleshooting for both Cricut and Silhouette
🌟 Want ongoing inspiration, templates, and community? → Secret Sticker Society membership gives you new tutorials every month plus a supportive community of fellow sticker makers!
Final Thoughts: Your Art Deserves to Be Stickers
I've taught over 20,000 students to make stickers. And do you know what I see again and again?
Artists sitting on beautiful drawings, thinking:
- "My art isn't good enough"
- "Nobody would want stickers of my drawings"
- "I'm not a 'real' artist"
- "It's probably too complicated"
And then they try it. And they're amazed.
Because here's the truth:
Your hand-drawn art has something mass-produced stickers will never have: soul.
The slight imperfections, the unique lines, the personal style - that's what makes people stop and say "Where did you get that sticker?"
You don't need to be a professional artist. You don't need expensive equipment. You don't need to be "perfect."
You just need:
- A drawing you like
- A willingness to try
- The simple process I've laid out in this guide
The hardest part is starting.
So grab that sketchbook. Pick a drawing that makes you smile. And let's turn it into something amazing.
I can't wait to see what you create! 💝✂️
Ready to get started? Download my Free Sticker-Making Starter Kit →
JOIN THE COMMUNITY:
Learn to make stickers from scratch that you're proud to use a share!