5 Creative Ways to Use Leftover Sticker Paper (Stop Throwing Money Away!)
Discover how to use leftover sticker paper and turn it into adorable mini stickers, gift tags, and more - because every piece is too precious to waste!
At a Glance:
⏰ Time needed: 10-30 minutes
📊 Difficulty: Super easy - perfect for beginners!
💰 Cost: $0 (uses scraps you already have)
✂️ What you'll need: Leftover sticker paper, scissors or craft punchers
🎨 Best for: Anyone who hates wasting sticker paper, crafters on a budget, beginners practicing skills
If you've ever stared at your pile of leftover sticker paper scraps and thought:
👉 "I don't want to waste this expensive sticker paper..."
👉 "These pieces are too small to use for anything..."
👉 "I've already wasted so much money trying to learn sticker making..."
You are absolutely not alone.
I hear this from my students constantly. Sticker paper isn't cheap (typically $10-15 for 25 sheets), and when you're learning to make stickers, it can feel like you're burning through money with every failed cut or design mistake.
But here's what I want you to know: Those scraps are actually treasure!
I'm going to show you 5 super cute and easy ways to use every last bit of your leftover sticker paper - no fancy tools required, no design skills needed, just simple creative fun that makes your sticker-making practice feel less wasteful and way more joyful.

Why You Should Never Throw Away Sticker Paper Scraps
Before we dive into the how, let's talk about why this matters:
The Money Factor:
- Quality sticker paper costs $0.40-$0.60 per sheet
- That "tiny scrap" might represent $0.10-$0.20
- A pile of scraps = several dollars sitting in your craft drawer
- Using scraps means more stickers per dollar spent!
The Learning Factor:
These small pieces are actually PERFECT for:
- Practicing cutting techniques without wasting full sheets
- Testing new designs on a small scale
- Experimenting with colors and shapes
- Building confidence before tackling bigger projects
The Joy Factor:
There's something absolutely delightful about creating something useful from what you thought was "waste." It's sustainable, it's creative, and it makes sticker-making feel like play instead of pressure.
💭 What our community says:
"I used to throw away all my scraps and felt SO guilty about the waste. Now I have a little box for them and I actually get excited when I have leftover pieces because I know I can make something cute!" - Kim
What You'll Need (You Already Have This!)
Essential:
- Leftover sticker paper scraps (any size, any color)
- Scissors (regular craft scissors work perfectly)
Optional But Fun:
- Craft punches (circle, star, heart, etc. - find them at dollar stores!)
- Pens or markers (for adding designs or color)
- Washi tape (to add patterns and color, these look cute!)
- Ruler (for cutting straight edges)
- Pencil (for sketching shapes before cutting)
The beautiful thing: You probably already have everything you need!
5 Creative Ways to Use Your Leftover Sticker Paper
1. Make Mini Gift Tags + Envelope Seals
Those little scraps that are "too small for stickers"? They're actually the PERFECT size for gift embellishments!
What you can make:
- Tiny gift tags
- Envelope seals for cards and letters
- Package decoration for handmade gifts
- Cupcake toppers for parties
- Bookmarks or page markers
How to do it:
For Gift Tags:
- Cut scrap or leftover sticker paper into easy-to-punch pieces. Kraft sticker paper is lovely for this.
- Grab a cute puncher and punch a section out
- Write recipient's name or a tiny message, draw a tiny design, or leave plain
- Stick on your gift as decoration, a message tag, or to seal envelopes.
Why this is genius:
- Uses all tiny pieces
- Takes 30 seconds per tag
- Makes gifts look extra thoughtful
- Way cuter than store-bought tags!
This is perfect if you've ever thought:
"I want to make something special for family and friends"
"I need last-minute gift embellishments"
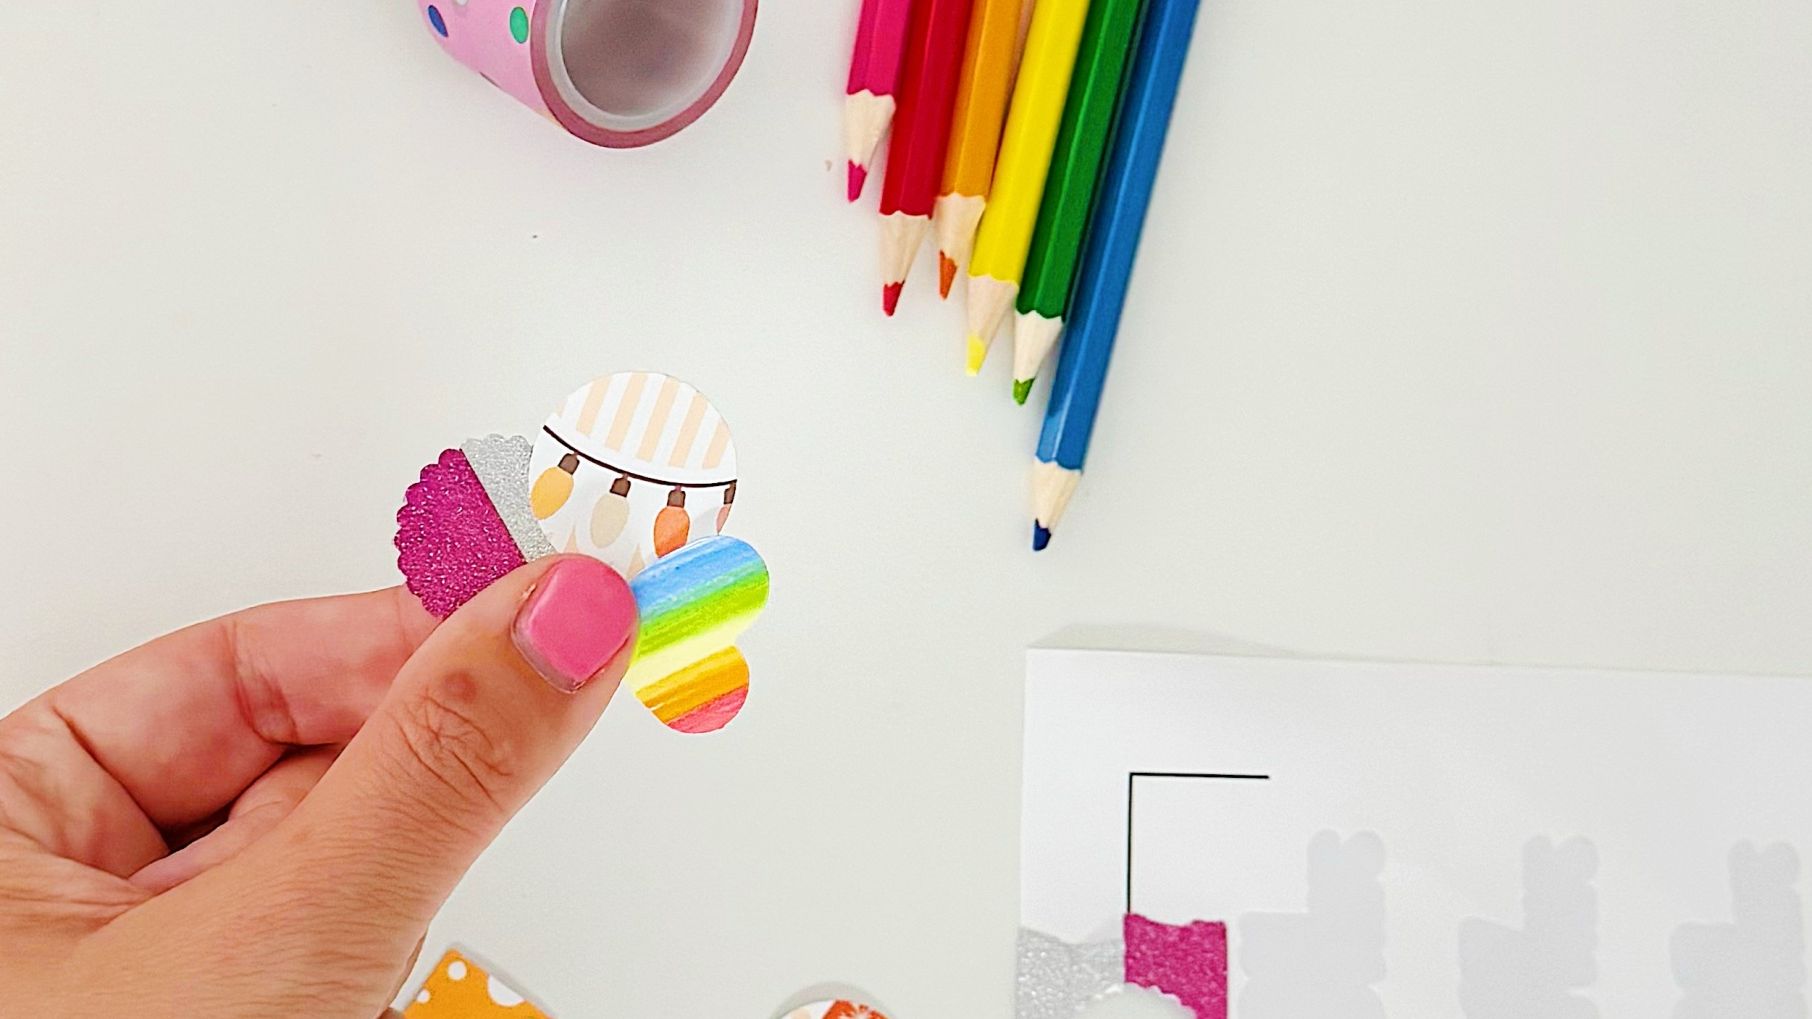
2. Create Cute Mini Stickers with Hand-Drawn Designs
Can't draw? Don't worry! Simple shapes and doodles look adorable on tiny stickers.
What you can make:
- Simple shapes (hearts, stars, circles, flowers)
- Quick doodles (smiley faces, coffee cups, books)
- Hand-lettered words ("yay!" "thanks!" "love")
- Tiny patterns (dots, stripes, simple florals)
How to do it:
Easy Method (No Drawing Skills Required):
- Cut scrap into small shape with a craft puncher
- Draw simple outline shapes with a pen or marker
- Add dots, lines, or simple patterns
- Optional: Color in with markers or colored pencils
- Cut around your design if you want a die-cut look
Simple Design Ideas:
- Hearts: Just two curves and a point!
- Stars: Draw an X, then add lines between
- Flowers: Circle in center + 5 petals around
- Coffee cups: Rectangle + curved line for steam
- Books: Stacked rectangles with lines
Color-In Fun:
- Use scraps that already have patterns or colors
- Add your own designs with pens
- Let kids color them in
- Try different color combinations
Why this works:
- No design software needed
- No printing required
- Imperfect = charming and unique
- Great for stress relief and creativity
💡 Pro tip: Keep these super simple! The smaller the sticker, the less detail you need. A tiny heart outline is more effective than a detailed, intricate design on a tiny sticker.
This is perfect if you:
"Just want a fun creative outlet without pressure"
"Want to try something new"
"Don't think you're artistic enough to make stickers"
3. Repurpose Unused Stickers into New Shapes
Got stickers you printed but don't actually love? Or bought sticker packs where you only wanted a few designs?
Don't let them sit there forever - transform them!
What you can do:
- Cut printed stickers into new shapes
- Trim around specific elements you like
- Create smaller stickers from larger ones
- Extract individual icons from busy designs
How to do it:
Transform Store-Bought Stickers:
- Look at sticker sheets you're not using
- Identify elements you DO like
- Cut around just those parts with a craft punch
- Boom - new stickers you'll actually use!
Remake Your Own Designs:
- Printed stickers that didn't turn out how you wanted?
- Cut them into different shapes
- Transform rectangles into circles
- Turn squares into stars
- Extract the parts that DID work
Specific Examples:
- Floral stickers too big? Cut out individual flowers
- Quote stickers too busy? Cut out just the words you want
- Planner kit overwhelming? Cut it into individual functional pieces
- Printed test sheet? Cut out the designs that worked
Why this is brilliant:
- Uses stickers you already spent money on
- Saves you from buying new packs
- Gets more mileage from your existing stickers
- Reduces waste from "failed" prints
This solves the frustration of:
"Buying sticker packs just to use a few from each sheet"
"Wasting money on stickers that don't fit my style"
"Having stickers I never use sitting in a drawer"
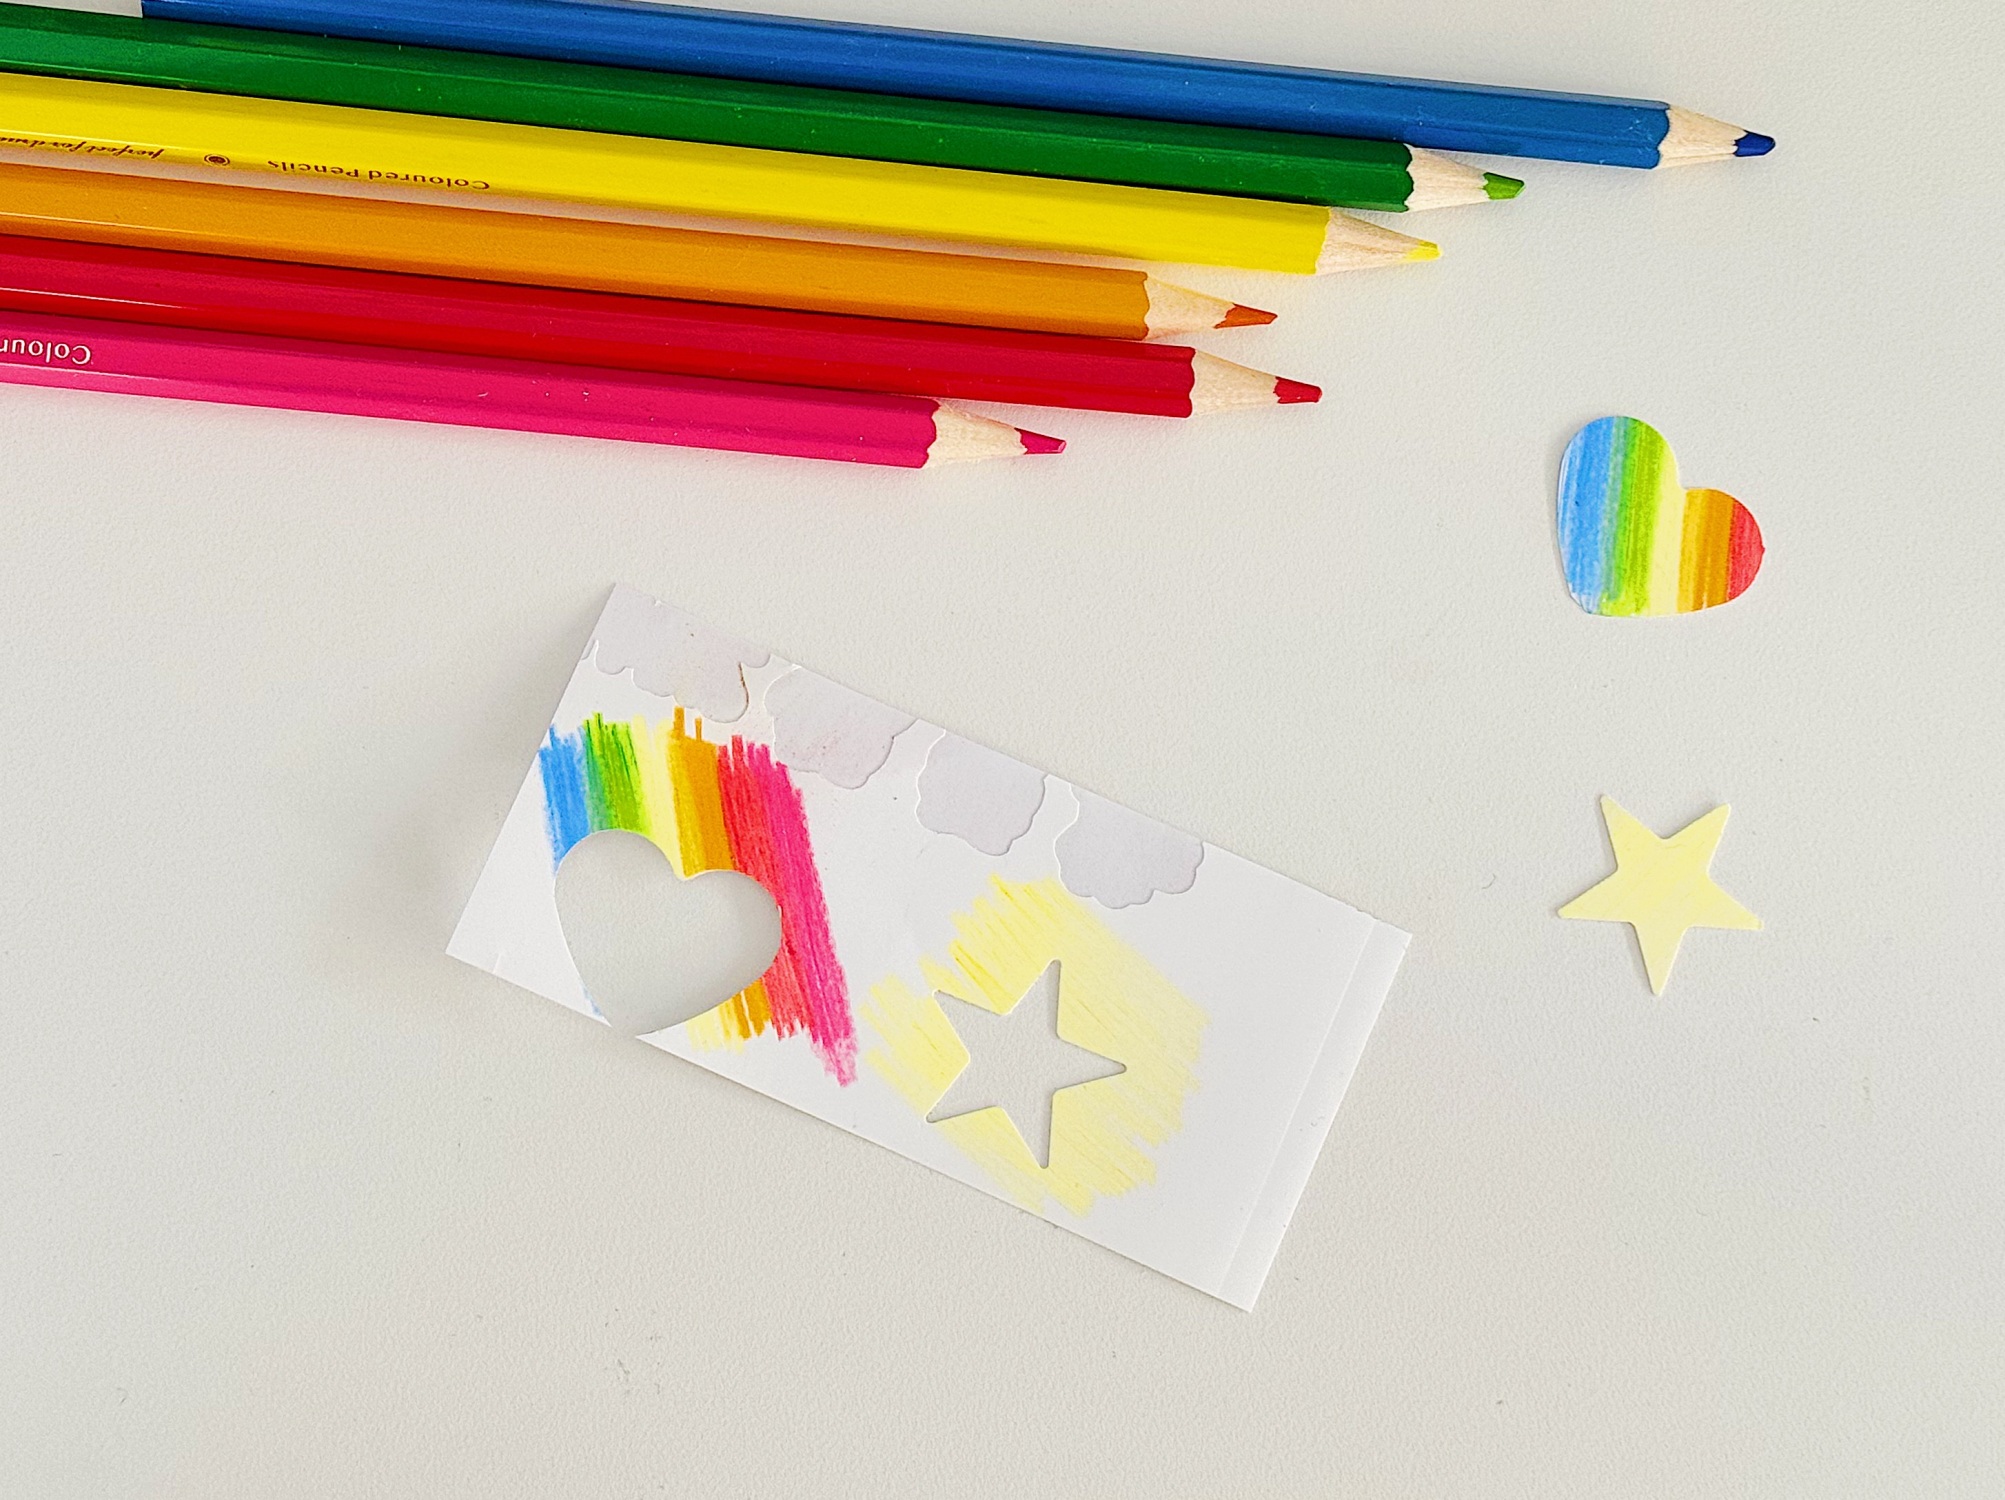
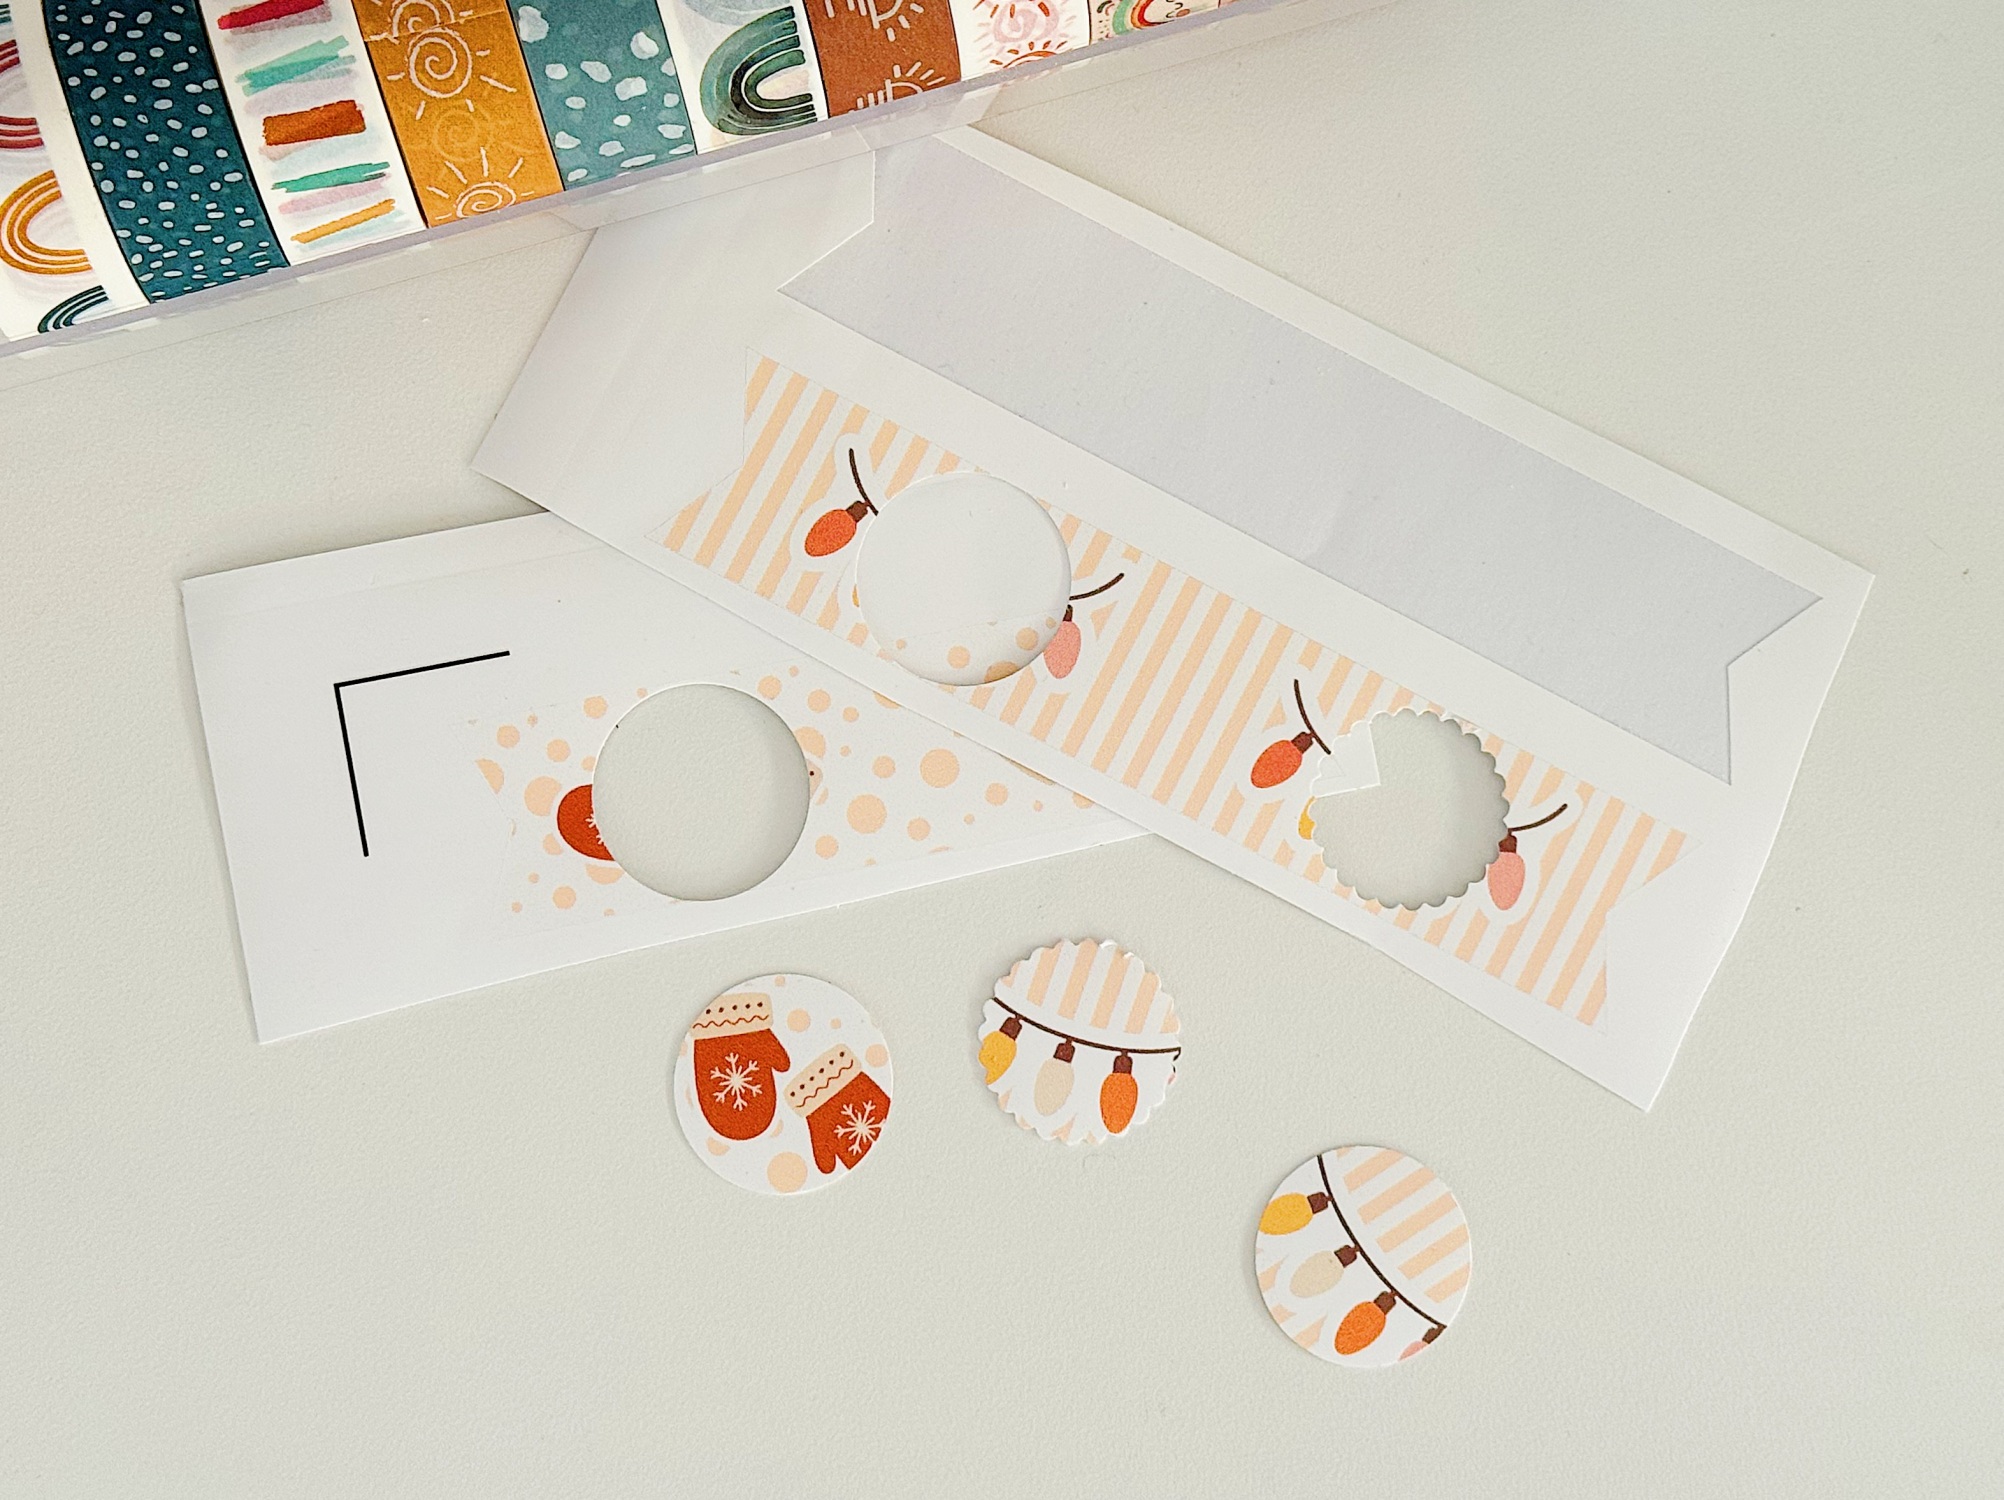
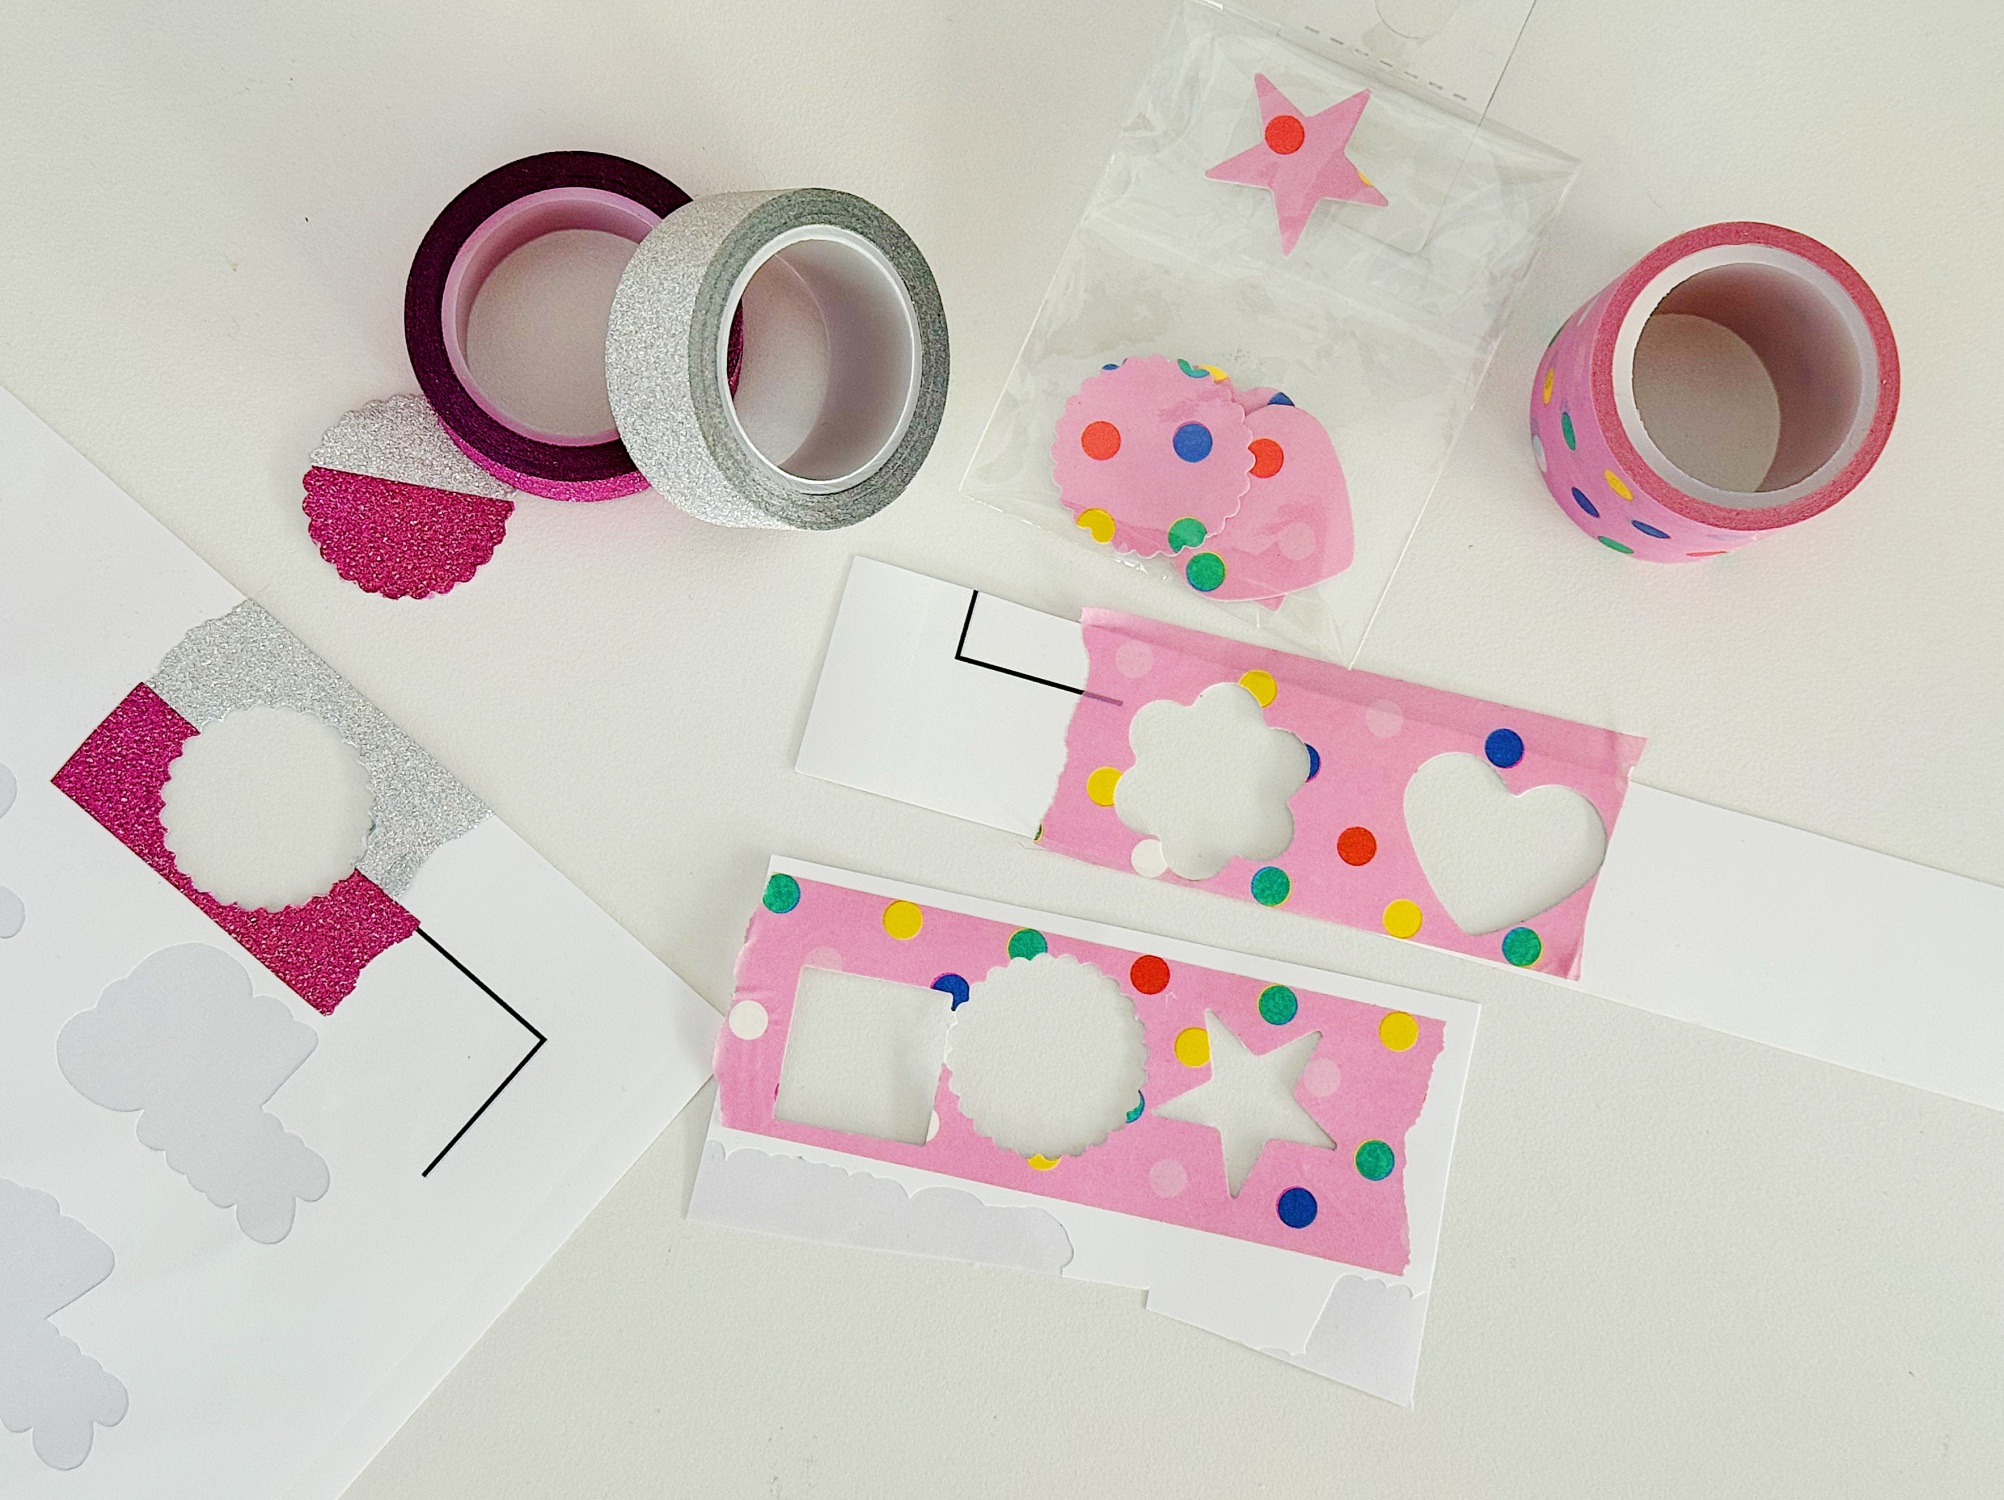
4. Layer Washi Tape Over Scraps for Instant Patterned Stickers
This is hands-down one of my favorite tricks! If your sticker paper scraps are plain white or a color you don't love, washi tape transforms them instantly.
What you get:
- Patterned stickers without printing anything
- Custom color combinations
- Unique designs you can't buy anywhere
- A use for all that washi tape you've been collecting!
How to do it:
Basic Method:
- Take a plain sticker paper scrap
- Layer washi tape across it (overlapping or side-by-side)
- Trim excess tape from edges
- Cut your desired shape from the washi-covered paper
- Peel and stick!
Advanced Techniques:
- Stripes: Layer different washi tapes horizontally
- Geometric: Cut tape into triangles before applying
- Mixed patterns: Combine different washi patterns
- Frames: Washi around edges, plain center for writing
Shape Ideas:
- Circles (use a circle punch if you have one!)
- Rectangles (perfect for planner boxes)
- Banners (triangle or pennant shapes)
- Hearts (for Valentine's or just because)
- Tabs (half-circles for page markers)
Why this is a game-changer:
- No printer needed
- No design software needed
- Instant gratification (done in minutes!)
- Completely customizable to your style
- Uses supplies you probably already have
Color combination ideas:
- Pastels: Mint + pink + lavender washi
- Bold: Black + gold + white washi
- Natural: Kraft brown + sage green washi
- Monochrome: Different patterns in same color family
💡 Pro tip: Dollar stores and craft stores have washi tape 3-6 rolls for $3-5! Stock up on coordinating colors and you'll have endless sticker possibilities from your scraps.
Perfect if you:
"Can't find the exact stickers you want to buy"
"Want to match your planner or journal theme"
"Love washi tape but aren't sure how to use it all"
5. Create Themed Mini Sticker Gift Sets
This is where leftover scraps become something really special - curated little sticker collections!
Instead of using scraps one-by-one, gather them into themed sets that make perfect gifts.
What you can create:
- Seasonal sticker packs (spring, summer, fall, winter themes)
- Color-coordinated sets (all pink, all blue, rainbow mix)
- Theme collections (coffee lovers, book lovers, plant lovers)
- Holiday gift sets (Christmas, birthdays, Valentine's Day)
- "Just because" surprise packs for friends
How to do it:
Step 1: Sort Your Scraps or Leftover Sticker Paper
- By color
- By size
- By pattern/design
- By season or theme
Step 2: Create Mini Stickers
Use any of the methods above to turn scraps into:
- Hand-drawn designs
- Washi tape patterns
- Cut shapes
- Repurposed stickers
Step 3: Package Them Prettily
- Small cellophane bags (dollar store!)
- Tiny envelopes
- Handmade paper pouches
- Washi tape-decorated cards
- Origami boxes
Step 4: Add a Personal Touch
- Hand-written note
- Custom label
- Decorative tag
- Themed packaging to match
Gift Ideas for Different People:
For Grandkids:
- Bright colors + simple shapes
- Reward stickers (stars, smiley faces)
- Their favorite colors/themes
- Include some blank ones they can color
For Teachers:
- Classroom themes (apples, books, pencils)
- Motivational shapes (stars, awards)
- Seasonal decorations
- Calendar stickers
For Planner Friends:
- Functional stickers (checkboxes, headers)
- Decorative elements (flowers, banners)
- Date dots or number stickers
- Coordinated color schemes
For Crafty Friends:
- Mixed patterns and textures
- Embellishment-style stickers
- Scrapbooking elements
- Card-making decorations
Why this is so meaningful:
- Handmade gifts show thought and care
- Costs almost nothing (using materials you'd throw away!)
- Can be made in batches for multiple people
- Personalized to each recipient
- Actually gets USED (not stuck in a drawer)
Packaging supplies (all cheap!):
- Cellophane bags: $3 for 100 on Amazon
- Small envelopes: Dollar store or recycle old cards
- Washi tape: For sealing and decorating
- Labels: Hand-write or print tiny tags
This is beautiful if you've ever said:
"I want to make something for my grandkids"
"I'd love to give little handmade gifts"
"I want to share my sticker hobby with others"
Why Using Leftover Sticker Paper Is So Powerful
This isn't just about being frugal (though that's great too!).
Using your scraps helps you:
1. Stop Feeling Guilty About Waste
Every crafter knows that feeling of throwing away supplies. Using scraps means less guilt, more joy!
2. Get More Value From What You've Already Bought
That $15 pack of sticker paper? You just extended its value by 20-30% by using every scrap.
3. Practice Skills Without Pressure
Small scraps = low stakes! Perfect for:
- Testing cut settings
- Trying new techniques
- Experimenting with designs
- Building confidence
4. Keep Creating When You're Low on Supplies
Waiting for sticker paper to arrive? Use scraps in the meantime! Stay creative without spending money.
5. Make Sticker-Making Feel Fun Again
When every piece matters and nothing is wasted, the whole process feels more joyful and sustainable.
Smart Storage Tips for Sticker Paper Scraps
To actually USE your scraps (instead of losing them), you need a simple storage system:
The Scrap Box Method:
- Keep a small box or container specifically for scraps
- Sort by size if you're organized (small, medium, large)
- Or just toss them all together and dig for treasures later!
- Keep it near your crafting area so it's easy to access
The Envelope Method:
- Store scraps in manila envelopes
- Label by color or size
- File in a desk drawer or craft caddy
- Super space-efficient!
The Page Protector Method:
- Slip scraps into page protectors
- Store in a binder
- Can see what you have at a glance
- Keeps them flat and protected
💡 Pro tip: Every time you finish a sticker project, immediately put scraps in your storage system. Don't leave them scattered! Future you will thank present you.
Quick Troubleshooting Tips
"My craft punch won't go through thick sticker paper"
Solution: Use scissors instead, or punch from the back (non-sticky) side. Some punches work better upside-down!
"My scraps are too small to hold while cutting"
Solution: Stick them lightly to a cutting mat or piece of paper (sticky side down), then cut. Easy to peel off after!
"I don't have any craft punches"
Solution: You don't need them! Scissors work perfectly. Or trace around household items (coins for circles, lids for larger circles, etc.)
"My hand-drawn designs look messy"
Solution: That's the charm! Handmade = imperfect. Plus, small stickers hide imperfections. Keep designs simple and own the handmade aesthetic.
"The sticky backing won't peel off my mini stickers"
Solution: Cut a tiny "tab" on the corner (extra backing without sticker) to grab when peeling. Or use an X-acto knife tip to lift the corner.
Frequently Asked Questions
Q: What size scraps are too small to use?
A: Honestly? Almost nothing is too small!
- Under 0.5": Can still be tiny dots or confetti
- 0.5" - 1": Perfect for mini gift tags or envelope seals
- 1" - 2": Great for hand-drawn mini stickers
- 2"+: Lots of possibilities!
The only truly "too small" pieces are ones smaller than your fingernail - and even those can be sticker confetti for cards!
Q: Can I use scraps from failed print attempts?
A: Absolutely! Here's how:
If the print quality is poor:
- Cut around the parts that DID print well
- Use the blank/poorly printed areas for the techniques in this post
- Flip them over and draw on the back if the front is unusable
If the colors are wrong:
- Cover with washi tape (technique #4)
- Cut into shapes and color by hand
- Use for practicing cut settings
If the design is off-center:
- Cut out just the centered parts
- Use edges for mini tags or seals
Nothing is truly wasted unless you throw it away!
Q: How do I cut perfect circles without a punch?
A: Easy! Use household items as templates:
- Small circles: Coins (penny, nickel, quarter)
- Medium circles: Bottle caps, lip balm lids
- Large circles: Cups, mugs, mason jar lids
- Huge circles: Bowls, plates
How to do it:
- Place item on sticker paper
- Trace around with pencil
- Cut along the line
- Erase any visible pencil marks
Q: Can kids do these projects?
A: YES! These are perfect for kids (with supervision for scissors):
Best projects for kids:
- Hand-drawn mini stickers (they LOVE this!)
- Washi tape stickers (so colorful and fun)
- Gift tags for family
- Coloring in simple shapes
Benefits for kids:
- Practices fine motor skills
- Encourages creativity
- Teaches sustainability (don't waste!)
- Makes them feel accomplished
- Costs you nothing!
Safety note: Use child-safe scissors and supervise younger kids. Craft punches are great for kids since they don't require cutting skills!
Q: What if my scraps are different brands/finishes?
A: Mix them! Variety is fun:
- Glossy + matte = interesting texture mix
- Different whites = vintage/eclectic vibe
- Different thicknesses = works fine for these projects
The only time it matters:
If you're creating a professional sticker sheet to sell, consistency matters. But for personal use, scrap projects, and gifts? Mix away!
Q: Can I sell stickers made from scraps?
A: It depends:
You CAN sell:
- Hand-drawn designs on scrap paper
- Washi tape stickers (using your own design/composition)
- Shapes cut from your own printed designs
You CANNOT sell:
- Cut-up pieces from purchased sticker packs (copyright issues)
- Designs you don't own the rights to
- Brand logos or copyrighted characters
For gifts and personal use? Go wild! These techniques are perfect for that.
Ready to Make "Proper" Stickers? Start Here (It's FREE!)
🎁 Get My FREE Sticker-Making Print + Cut Starter Kit
Print and cut your first beautiful sticker sheet without wasting paper!
Playing with scraps is such a fun way to build confidence... but if you're ready to make FULL sticker sheets you're proud of, I've got you covered.
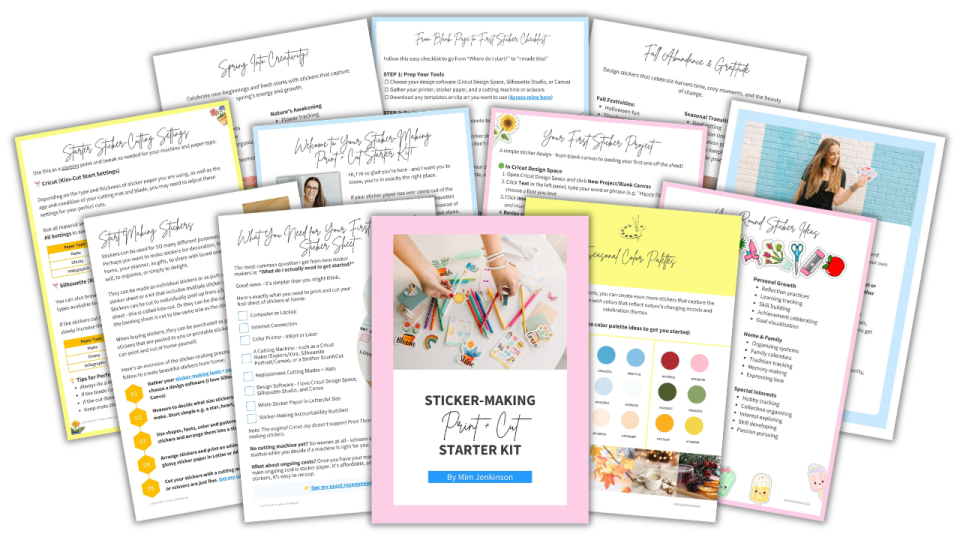
Inside this FREE Starter Kit, you'll get:
✂️ What You Actually Need to Get Started
The complete, no-fluff tools checklist - so you know exactly what to get (and what to skip) before you spend a cent. Simpler than you think!
🖨️ Starter Cut Settings for Cricut + Silhouette
No more wasted sticker paper! Get beginner-friendly print and cut settings for popular sticker paper - plus tips to troubleshoot cuts gone wrong.
📋 Your First Sticker Project - Step by Step
Follow a simple, beginner-friendly walkthrough to design, print, cut, and peel your very first sticker in Cricut Design Space or Silhouette Studio.
✅ From Blank Page to First Sticker Checklist
A 5-step checklist that takes you from "Where do I even start?" to "I made this!" — no experience needed.
🎨 BONUS: Seasonal Color Palettes + Ideas
Stay inspired all year with ready-to-use color combinations and sticker ideas so you never run out of what to make next.
This free Starter Kit gives you the tools, settings, and a simple first project - so your printer and cutting machine finally work with you, not against you.
It's perfect for you if you're making stickers for:
- 📅 Seasonal celebrations
- ✨ Your planner
- 🎁 Gifts for loved ones
- 🧠 Mindfulness + journaling
- 📝 Scrapbooking + memory-keeping
Got a Cricut or Silhouette sitting on your shelf, but stickers haven't happened yet? Or tried to print and cut and ended up with a pile of wasted paper and a lot of frustration?
This Starter Kit was created by sticker pro Mim Jenkinson, who has helped over 20,000 crafters make their first (and hundredth) sticker from scratch.
Get your FREE Starter Kit →
Final Thought: Every Scrap Has Potential
Here's what I want you to remember:
Sticker-making doesn't have to start with perfect designs, expensive equipment, or full sheets of pristine sticker paper.
Sometimes it starts with:
- A tiny scrap you almost threw away
- A simple idea
- Five minutes at your craft table
- Something that makes you smile
And honestly? That's more than enough to begin.
Those little scraps represent possibility. They're permission to experiment without pressure, create without perfection, and play without worrying about waste.
So save those scraps. Put them in a pretty box. Pull them out when you need a creative break. Make something tiny and joyful.
Because the best part of crafting isn't always the "finished product."
Sometimes it's the playful process of turning "waste" into something wonderful 💕
Ready to stop wasting sticker paper and start creating?
Pick one technique from this post and try it this week! Then come back and let me know which one you tried - I'd love to hear about it!
Tag me on Instagram: @mimjenkinson
Happy creating! ✂️💝
JOIN THE COMMUNITY:
Learn to make stickers from scratch that you're proud to use a share!