
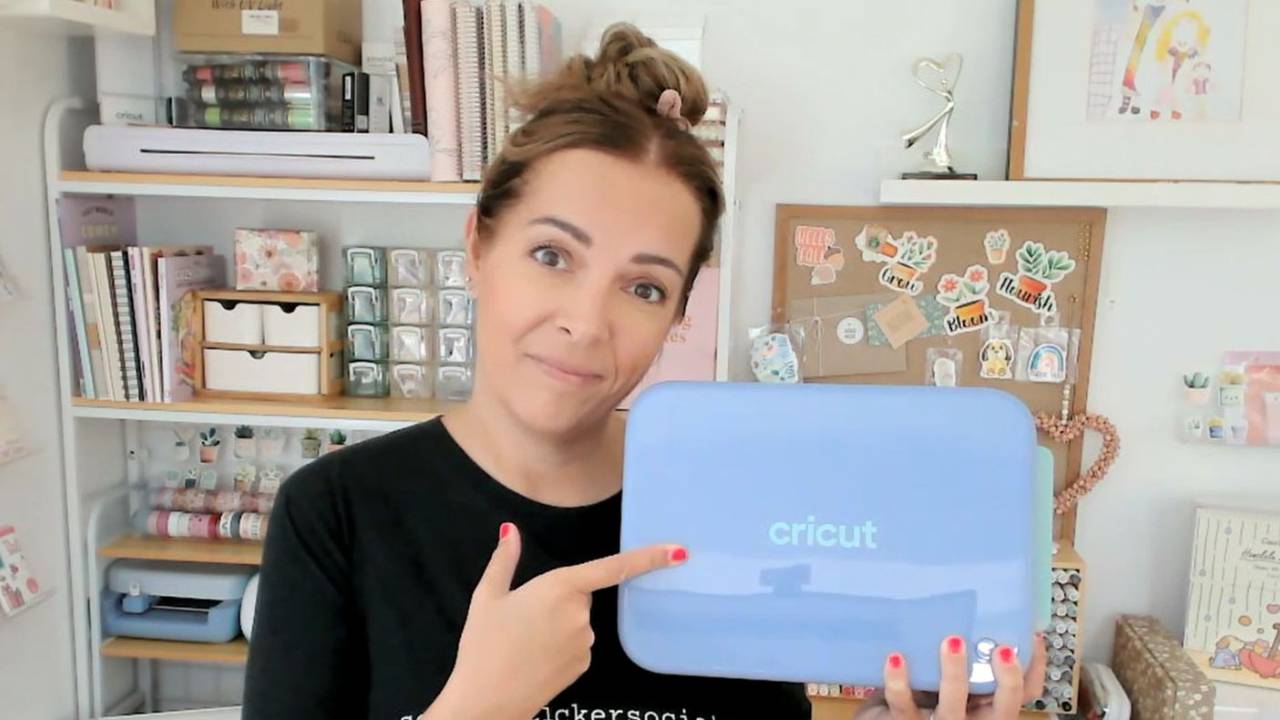
Cricut StickerPix Review: 100% Honest Pros, Cons + Verdict
I'd seen people raving about the Cricut StickerPix Print + Cut. I'd also seen some really mixed reviews from crafters who'd actually bought one. So I did what I always do when I want a straight answer. I bought one myself, filmed everything from opening the box to peeling my very first sticker, and put it through its paces as someone who makes stickers every single day.
This is my honest Cricut StickerPix review. Nobody sent me this machine, nobody is paying me to say nice things, and I'll tell you exactly who I think it's for (and who I think should save their money).
At a glance: my StickerPix verdict
- Model tested: Cricut StickerPix Print + Cut (it prints, cuts and laminates in one machine)
- Sticker sheet size: 4 x 7 inches only (usable area is closer to 4 x 4.6)
- Cut type: Kiss cut only. No die cut, no easy peel
- Supplies: Cricut sticker paper and Cricut ink cartridges only
- Best for: Crafters who want to make simple stickers now and then, have a small space, and only want to learn one machine
- Not ideal for: Crafters who want to make lots of stickers, make stickers long term, or sell them
- Would I buy it again? No. I'll use up my supplies, but I'm sticking with my separate printer and cutting machines
Watch my full Cricut StickerPix Review
If you'd like to see the whole thing (including the moment I spent far too long looking at the wrong end of the machine), here's the full video:
Why you can trust this review
I've been making stickers for around 10 years, and I've been teaching Cricut for most of that time. Behind me in my craft room there's a little collection of cutting machines: my Cricut Joy Xtra, my Silhouette Portrait, and a Joy and Joy 2 that I bought again purely to test.
The two I use every day are my Joy Xtra and my Silhouette Portrait. I've also used three different printers over the years, so I know how much print quality can vary and what a good sticker should look and feel like.
So I came to the StickerPix with one question: how does an all-in-one sticker machine stack up against the setup that thousands of my students use every day?
Unboxing and setting up the StickerPix
There are two StickerPix models. I bought the Print + Cut version, because that's the one most crafters ask me about.
My very first reaction when I lifted it out? It's heavier than I expected. It looks a bit like a big kid's lunchbox, and it felt about the same weight as my Cricut Xtra in my hands.
Inside the box you'll find:
- The StickerPix machine
- A Cricut print cartridge
- Cricut sticker paper (4 x 7 inch sheets, which is roughly a quarter of a letter or A4 page)
- Photo paper
Setup was straightforward. You click in the ink cartridge, load the paper printing side up into the material tray using the adjustable guide, close the tray cover, plug it in and power on. Cricut does a good job of walking you through new machine setup in Design Space, and this was no different.
Two things surprised me straight away. First, it makes a noise a bit like a vacuum cleaner when you turn it on! Second, Design Space didn't give me the usual blank canvas option. Instead, I had to choose between Cricut templates, labels, or stickers. I picked stickers and then "start designing."
Making my first sticker sheet
I didn't want to use Cricut's ready-made stickers, because I wanted a fair test. So I uploaded some hand-drawn designs my husband Miles made for me (a coffee cup, a hedgehog, and a few more). Because I knew exactly how these designs should look, I'd be able to spot any print quality issues straight away.
Here's what I did in Design Space:
- Chose stickers, then "start designing"
- Uploaded my images
- Resized each one (I started with a width of 1.4 inches)
- Set the border to 0.05
- Arranged them on the 4 x 7 sheet
- Left the background plain (you can add a colour, a pattern from your library, or upload your own)
- Clicked Make
The machine then needed connecting and activating, which took a while. And then I made my first mistake: I put the paper tray in the storage slot instead of the feed slot, so the light flashed red at me. User error, completely! Once I'd moved it to the right place, it printed, cut and laminated the sheet in one go.
It's noisy, with some light squealing as well (!) as that vacuum sound. But a few minutes later I had a shiny, finished sheet of stickers.
So how did the stickers turn out?
- Print quality: Really good. Miles's drawings looked just as they should.
- Cut quality: Clean, with no jagged edges when I peeled them.
- Cut accuracy: Not great. The border was noticeably thicker on the right-hand side and the bottom of every sticker. Still usable, but the perfectionist in me wanted it even all the way around.
- The paper: Lovely and smooth on top, with a clear backing I didn't expect.
- The peel: The stickers curled at the edges when I peeled them up. More on that below.
Already have a Cricut or Silhouette and a printer?
You may not need a new machine at all. My free Print and Cut Starter Kit shows you how to get clean, accurate print then cut stickers with the setup you already own, so you can stop wasting sticker paper on failed attempts.
Get the free Print and Cut Starter KitCricut StickerPix pros
These are in no particular order.
- Great print quality. Using designs I knew well, I was really impressed with how the prints came out.
- The sticker paper feels lovely. It's not the paper I normally reach for, but it has a nice finish. (I haven't tested writing on it yet.)
- Clean cuts. Even though the alignment was off, the cuts themselves were crisp with no jagged edges.
- It laminates for you. Print, cut and laminate all happen in one go.
- One machine to learn. If you only want to learn one machine, or only have space for one, this could be the answer.
- Easy to set up. Cricut's setup steps are clear and beginner-friendly.
- Compact. Everything packs into a neat rectangular shape. It could be handy for travel, events or markets, as long as you have power and don't mind carrying the weight.
- Lots of templates. If you love a ready-made template, there are plenty in the Cricut library for individual stickers and pre-cut labels.
Cricut StickerPix cons
Again, in no particular order.
- Heavier than expected. As far as I can tell it's around 3 kg, which is similar to (or a little more than) my Cricut Xtra. Not too heavy to take places, but worth knowing if travel is your reason for buying it.
- Kiss cut only. There's no die cut option and no easy peel option. For me, that's really limiting.
- One sheet size only. You're stuck with 4 x 7 inch sheets, and with the unused space at the top and bottom the usable area is closer to 4 x 4.6. I love filling a full letter or A4 sheet, and I like choosing my own sheet sizes.
- Limited offset control. From my first test, I couldn't use Cricut's offset feature. I had to use Cricut's own sticker border instead. Offsets are one of my favourite tools, and I use them in lots of different ways.
- Cricut supplies only. You can't swap in a different ink cartridge or your favourite sticker paper. A lovely crafter in my community warned me that using other paper could damage the machine, so I won't be testing that. If you're tempted, contact Cricut first.
- All-in-one can be a downside. If one part stops working, you may lose the whole machine. I'm assuming (and please correct me if I'm wrong) that if the ink runs out, you can't just use it as a cutter. In my experience with other all-in-one machines, when one part breaks, everything does.
- Curling stickers. Every sticker I peeled curled at the edges. If I change my mind about where a sticker goes, I like to be able to stick it back down, and I'm not sure I could with these.
- Lamination every time. Only around 10% of my stickers need laminating, so for my everyday stickers it's an extra I don't need.
- Noisy. Squealing and vacuum sounds, which surprised me.
- The look. A small thing, but I'm not a fan of the blue. I'd love it in white or the off-white of the Joy Xtra.
Who is the Cricut StickerPix for?
This really comes down to where you are in your sticker-making journey, and what you want stickers to be in your life.
It could be a great fit if you:
- Want to dabble and make simple stickers every now and then
- Have a small craft space
- Only want to learn one machine
- Love using ready-made templates
- Want laminated stickers most of the time
I'd suggest a different setup if you:
- Want to make lots of stickers
- See sticker making as a long-term hobby
- Might sell stickers one day
- Want die cuts, easy peel tabs, or custom sheet sizes
- Love using offsets and having creative control
- Want to choose your own paper and ink
If you're in the second group, I honestly feel I'd be doing you a disservice if I recommended this machine. And I want to be really clear: this is not a teardown of Cricut. I'm in Design Space almost every day and I've taught Cricut for 10 years. I just don't think this machine is as well thought out as I'd hoped.
My final verdict
I'm pretty married to my Joy Xtra and my Silhouette Portrait. Am I going to cheat on them with the StickerPix? From my testing so far, probably not.
That said, I don't like things going to waste. I'll keep using it until I've finished the supplies I bought, and I may share a follow-up once I've had more time with it. If my thoughts change, you'll be the first to know.
What crafters in my community say about offsets and control
One of the biggest reasons I'm not won over by the StickerPix is the loss of offset control. It's often the exact skill that makes stickers "click" for the crafters I teach. Here's what a few of them shared after my live classes:
"I was able to figure out what I was missing with my stickers. The offsets."
Lynda, Sticker Week student
"Learning how to make the 2nd offset to create a tab to easily pull the sticker off."
Susan N, Sticker Week student, on her favourite part
That easy peel tab Susan mentions? It's one of the things the StickerPix can't do.
Pro tips if you already own a StickerPix
- Check which slot you're using. The machine has a storage spot for the material tray and a separate feed slot. If the light flashes red after you click Make, check the tray is in the feed slot.
- Let the sheet finish completely. It may look done before it is. Wait until the machine has fully stopped, then give the sheet a minute before peeling.
- Start with a small border. A border of 0.05 gave me a neat result. Test on one sheet before committing to a full batch.
- Plan for the usable area. Design within roughly 4 x 4.6 inches, not the full 4 x 7, so nothing gets clipped.
- Make smaller sheets with a trimmer. If you want mini sheets, design a few groups on the 4 x 7 sheet and cut them apart with a paper trimmer or guillotine.
- Stick to Cricut supplies. Until Cricut confirms otherwise, don't risk the machine with other paper.
Troubleshooting the StickerPix
The light is flashing red after I click Make.
Check the material tray is loaded into the feed slot, not the storage spot. This one caught me out!
My borders are thicker on one side.
This happened on my first sheet, with a wider border on the right and bottom of every sticker. It looks like a cut alignment issue. Check Design Space and Cricut's support pages for calibration steps for your machine, and contact Cricut support if it continues.
There's no blank canvas option.
With the StickerPix selected, Design Space asks you to choose templates, labels or stickers. Choose stickers, then "start designing" to upload your own images.
My stickers curl when I peel them.
This happened with every sticker I tested. Peel slowly and stick each one straight onto its final spot.
It's making strange noises.
Mine made vacuum and squealing sounds during setup and printing, and everything still worked. If anything sounds like grinding or the machine stops part way, contact Cricut.
Cricut StickerPix FAQs
Is the Cricut StickerPix worth it?
For crafters who want to make simple stickers now and then, have little space and only want to learn one machine, it could be. If you want to make lots of stickers, enjoy creative control, or plan to sell, a separate printer and cutting machine is a better long-term choice.
What size sticker sheets does it make?
4 x 7 inches. With the unused space at the top and bottom, the usable design area is closer to 4 x 4.6 inches.
Can the StickerPix make die cut stickers?
Not in my testing. It only made kiss cut stickers on a 4 x 7 sheet, with no die cut or easy peel option.
Can I use my own sticker paper or ink?
It's designed for Cricut paper and Cricut cartridges only. A crafter in my community warned that other paper could damage the machine, so please check with Cricut before trying.
Does it laminate the stickers?
Yes. The Print + Cut model prints, cuts and laminates in one go.
Can I use the offset tool in Design Space?
From my first test, no. I had to use Cricut's built-in sticker border instead of the regular offset feature.
Is it good for selling stickers?
I wouldn't recommend it for selling. The fixed sheet size, kiss cut only option, Cricut-only supplies and limited offsets make it hard to create the range of stickers buyers look for.
Is it a good machine for travel or markets?
It's compact and packs neatly, so it could work for events or markets. Just remember it's around 3 kg and needs a power source.
What do you use instead?
My everyday setup is a home printer plus my Cricut Joy Xtra or Silhouette Portrait. It gives me full control over sheet size, paper, cut type and offsets.
Want to make beautiful stickers with the machine you already have?
If this review has you thinking, "Hang on, maybe I don't need a new machine," you're not alone. Most of the frustration I hear from crafters isn't about the machine at all. It's about cut lines not lining up, wasted sticker paper, and not knowing which settings to use.
Those are all things you can fix.
- Start free: My Sticker-Making Starter Guide walks you through getting clean, accurate print then cut stickers with Cricut or Silhouette.
- Learn from scratch: Sticker Making 101 takes you from blank canvas to beautiful sticker sheets, including offsets, kiss cuts and die cuts.
- Keep growing every month: Inside the Secret Sticker Society you'll get new sticker projects each month and a friendly community of sticker-making friends cheering you on.
Make stickers you're proud of, with the machine you already own
Grab my free Sticker-Making Starter Guide and say goodbye to wonky cuts and wasted sticker paper.
Send me the free Starter GuideOver to you
Do you have a StickerPix? Do you love it or loathe it? Or are you still trying to decide? I'd really love to hear your thoughts, and I learn so much from you. Leave a comment on the YouTube video and tell me what you think.
Happy sticker making!
Mim x
JOIN THE COMMUNITY:
Learn to make stickers from scratch that you're proud to use a share!